Saturday, December 30, 2006

SWAP #4 - Print Skirt

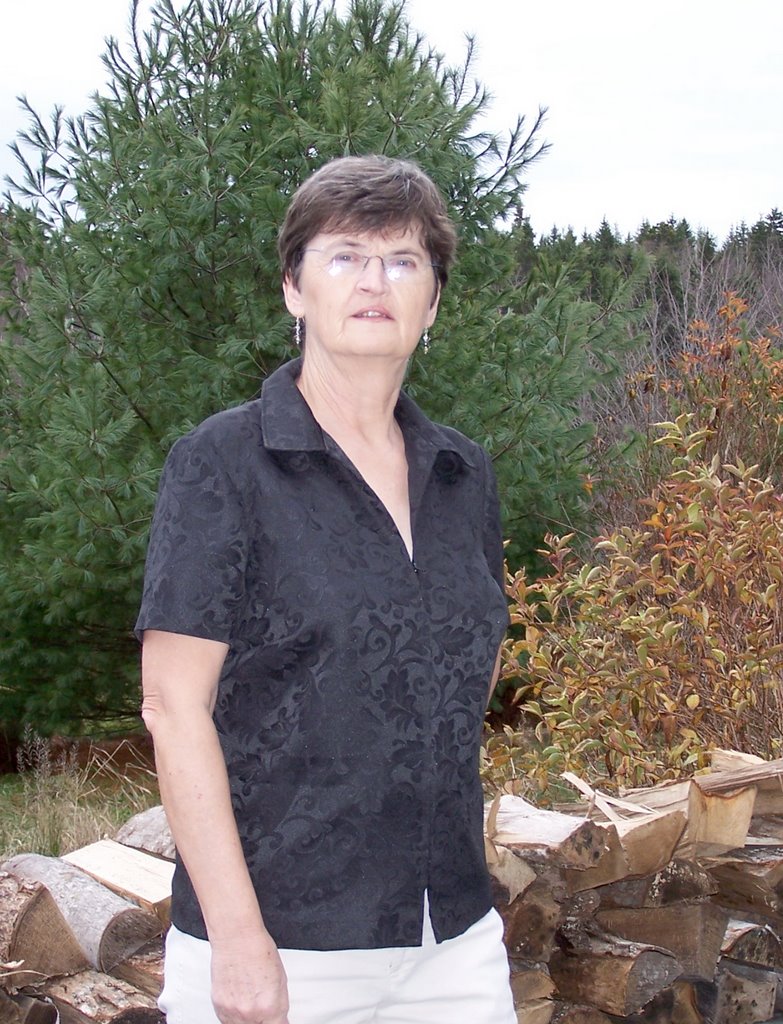
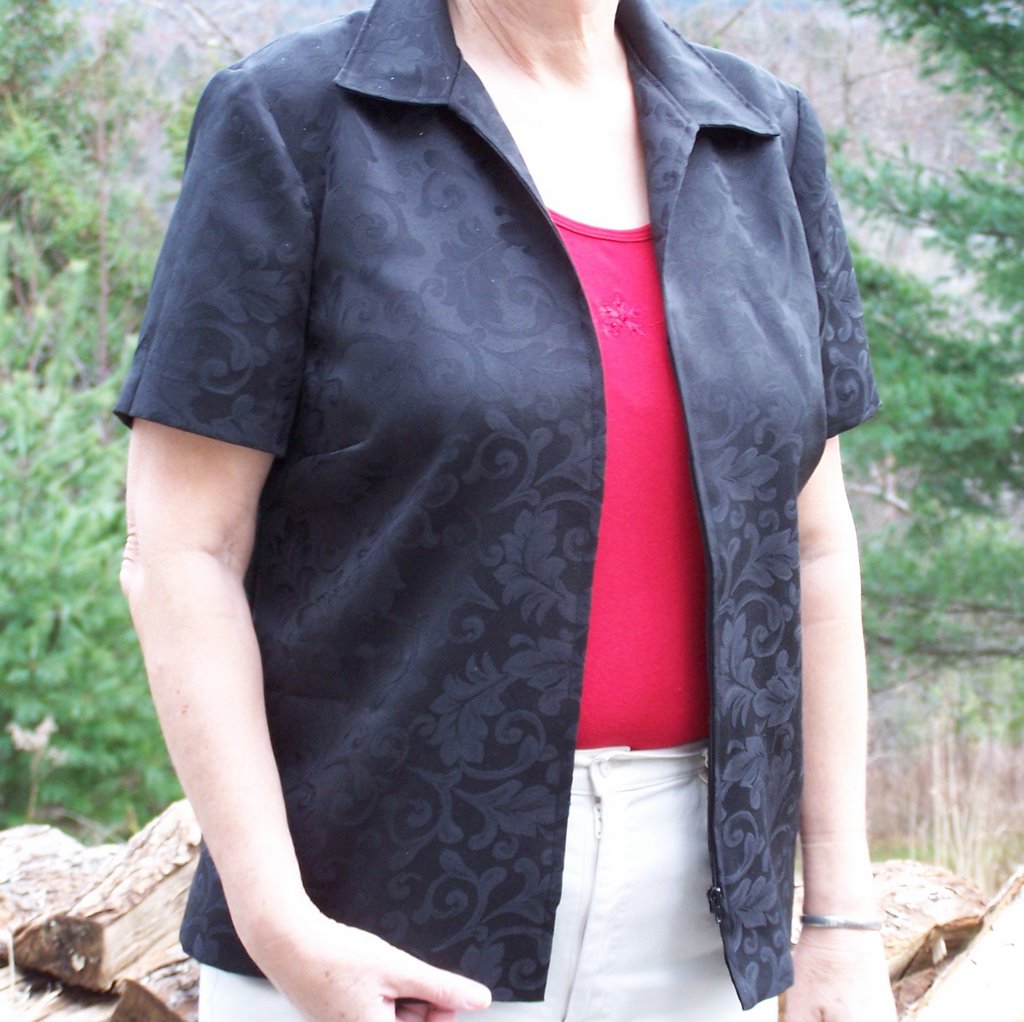
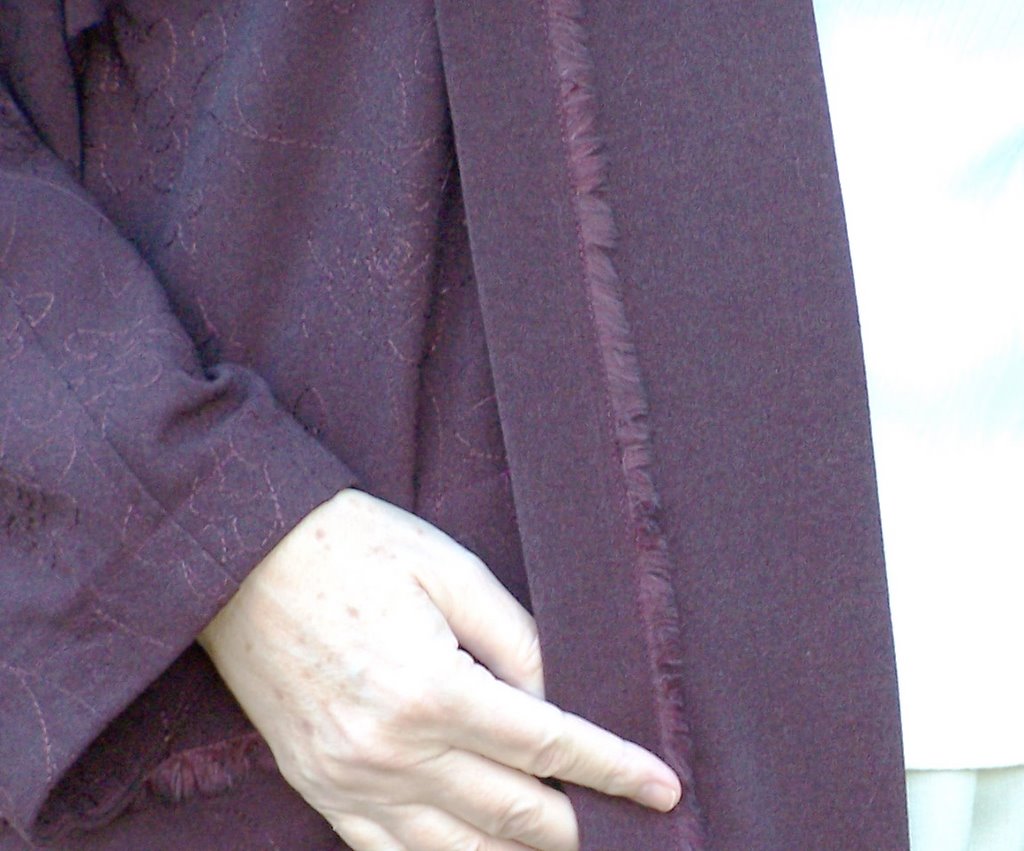
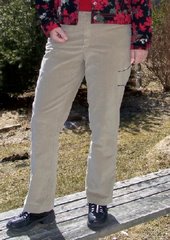
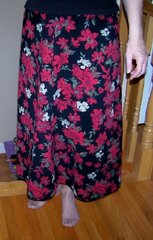
Finally back to sewing after the Christmas celebrations and busyness. Simplicity 9825, View D, went together easily right from the pattern. Size 16, no adjustments required. This was made in a bottom-weight cotton twill.

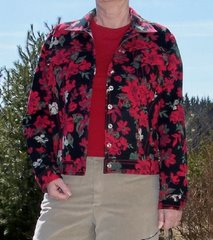
I had a bit of trouble straightening the grain in the fabric, and I have to wonder if it got twisted when being washed. I had sewed the ends together and put a length of at least 3m into the wash. Perhaps that is too big a piece for an agitator-type washer. I don't remember having a problem previously with the piece I cut for my jacket lining. It was a shorter length to start with, so perhaps it did not twist. Or, maybe I was not paying attention.

Anyway, after some pulling and mild cussing, the grain was in a passable state and luckily, the skirt hangs well in spite of itself.

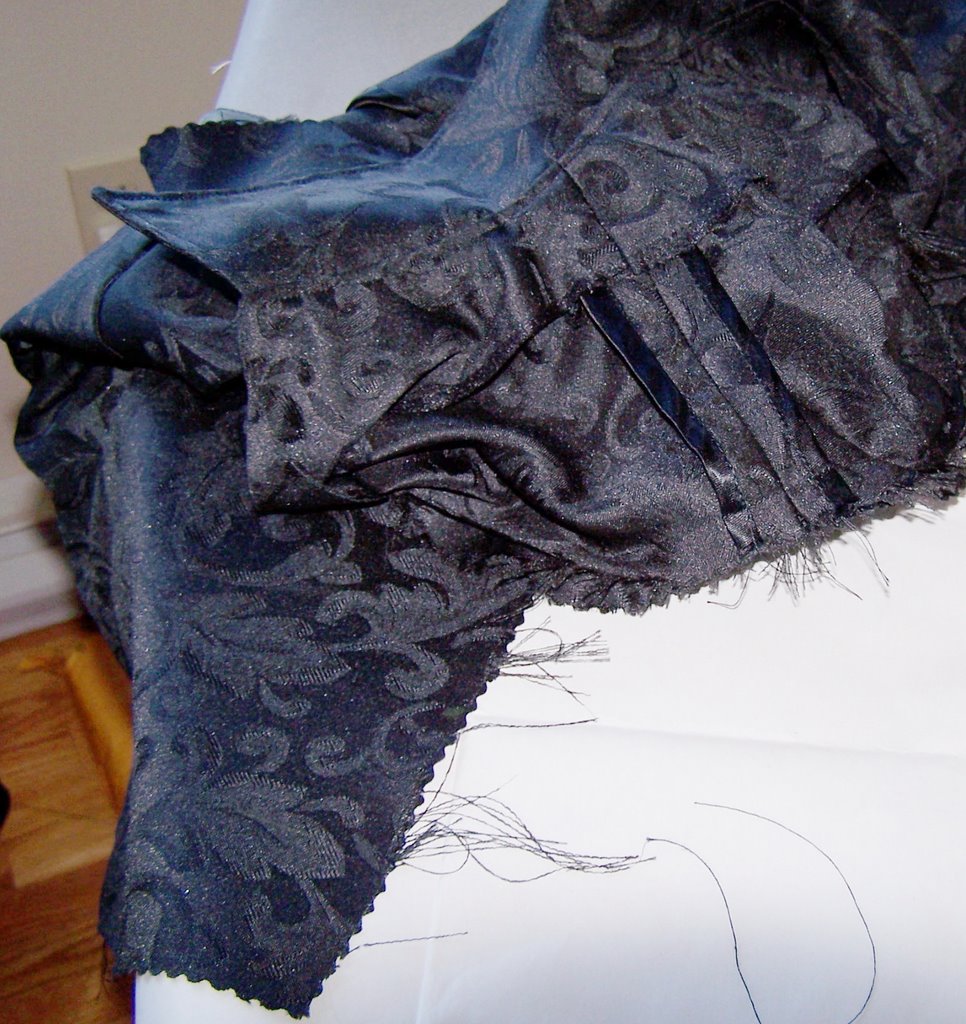
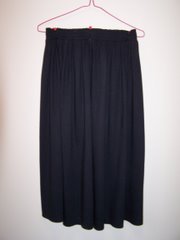
This pattern has a wide, faced yoke at the top, and I discovered that this must be very carefully cut in order to save grief at the end. If it were necessary to make post-pattern fitting adjustments at the waist or hip, it could be quite a painful process to get facings to match the yoke exactly. The construction is similar to the plum pants waistline actually. If the side seams are taken in or let out, it would be difficult to get the exact-same seam allowances and angles on the facing. Something to fuss over, and try to get perfect on the pattern.

The skirt is eased onto the yoke, and there is a noticeable amount of ease involved. I think it is critical that the seam line be in the right place, as a even a bit narrower on the skirt side greatly increases the amount of ease to be dealt with. It could be difficult to get a smooth yoke seam in an unforgiving fabric


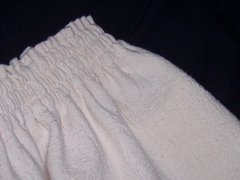
Twill Tape Question: The pattern suggested sewing twill tape onto the seamline when sewing the facing to the yoke. I did not do this, and it seemed to me that the twill tape would then be doubled at the edge where the facing turns back. This is edgestitched; the top of the yoke is stay-stitched; the yoke is interfaced with substantial material, so I felt the twill would be overkill. I do like the idea of something there, though, that prevents stretching at the waist. I will have to research the topic and see if the twill is supposed to be ON the seamline, or IN the seam allowance so it all turns to the back.

Research results: Julie suggests using seam binding, or a lightweight lining selvedge instead of twill on a waistline seam to reduce bulk. Now why could I not have thought of that?!

I may let the skirt hang a bit before hemming, not because it may stretch, but because I have a bit of Christmas still around my waist, and once it is gone, the skirt will drop a bit.

Monday, December 18, 2006

Plum Pants Revisited


Today I finally got around to taking some pictures of the finished pants. I wore the pants shopping, and took the pictures afterward. I was shocked to find that there are wrinkles everywhere, and not the kind you can iron out.

Also, the pants, which were very snug, (as has been previously referenced here) are now quite loose, even the waistband, which was interfaced with quite heavy pellon.

I've posted the whole lot in my SWAP photo album.

What's caused the wrinkles?
  • Hem resting on top of shoes
  • Fabric stretching out over the day
  • Grainline cutting errors
  • Needs a more substantial flat seat adjustment
  • Should have made a smaller size and hoped this would happen in the end
  • I've lost a lot of weight in the last 2 days
Next I am going to wash the pants, dry in the dryer and see if the fabric shrinks. Against my best practice, I did not pre-wash this fabric. It was inherited from my daughter, and it was a generous, unevenly cut, remnant. She probably didn't wash it either. So, in a way, this was a freebie, a good chance to practice with this pattern. Why I didn't at least pre-wash is beyond me. I totally loved these pants when I finished them.

Friday, December 15, 2006

SWAP #3: PLUM PANTS DONE!!


The plum pants, Vogue 2770, [apart from the waistband problems which were entirely of my own making], went together pleasantly well from start to finish.

I worked a bit each day, and took about a week to finish them. It is Christmas after all, and there are a few other things to attend to. I think that may be a lesson, to take small chunks of time rather than working for hours on end. If you stop when something gets frustrating, the job is always easier when you come back to it the next day. If you leave when something has gone well, you have a sense of accomplishment and are encouraged to start up again in the morning, or later in the day.

Tonight I finished the waist hook and eye, and measured and put in the hems. SUddenly, I was done, but for a good pressing. I was worried about how the hem would work around the leg vents, but it was clever and neat. I followed the pattern meticulously, without trying to come up with a better way. Lesson learn over the waistband.

Pictures will come in the daylight. It's still warm out, and I can get a better picture in natural light.

What next?? Maybe the OneSeam Pants so I can get the pattern off and use it to make velour pallazzo-type pants for Christmas morning.

Or, maybe, I should just put everything away until after Christmas and look after all those other things that should be done: Cinnamon buns, miscellaneous baking, maybe even clean the house. Oh no!

Sunday, December 10, 2006

Plum Pants are Percolating Perfectly


Spent a few hours this afternoon and evening working on the pants. Before breakfast I topstitched the fly front successfully, using masking tape to mark where the sewing should go. I observed that the following adjustments should be made next time around:
  • overlock the raw long edge of the fly before attaching it
  • don't forget to interface the fly facing, but more importantly, make the fly long enough to cover the bottom edge of the fly facing. Possibly cut 1/4 inch from the facing all around if it is not to be turned under (ie overlocked instead)
Seam finishes are important to me, and necessary for polyester. I really dont like the look of non-serger overlocking so I bound these seams with black tricot. I have not mastered the quick and easy way to apply it, but they look ok. Observation from doing that:
  • bind the edges of the back and front seams up to the notches BEFORE you sew the seam and BEFORE you put in the fly. Otherwise it is near to impossible to get a neat job.
I decided to put the waistband on before sewing the outside seams, as I figured there might be a fit problem at the waist, and also that I might later want to put some elastic in the back.

Afterword: This evening I got to the waistband. Discovery #1 was that I had somehow not paid enough attention to which side of the band got interfaced. This is a 3-part fitted waistband, and I had made notes on the pattern to be careful to get the sides lined up right before interfacing. There is an upside down, right-side wrong-side issue. When both sides of the fabric look the same, its possible to cut the bands so they don't match up. Well.....I had interfaced the front bands (which are different from each other) in such a way that they would not fit together with the interfacing on the back band. Not only that....but Dicsovery #2 was that all my efforts to get nice facings and do all that fussy stuff while the bands were unattached, proved to be futile, as there is no way to neatly sew them on in the zipper area with all the corners and edges already done; AND, as if that weren't enough, Discovery #3 was that the 2 layers of this fabric, especially with the grade of interfacing I used, make for a very heavy waistband in which the corners do not shape nicely, Therefore: A repair job will be necessary tomorrow:

More Afterword: (Friday) The waistband idea turned out to be a really bad one, and the pattern directions are definitely preferable, even though fitting at the waist could be tricky. As for elastic in the back, I think there must be a way to do this even by following the pattern directions. The back waistband has a few wrinkles, due I think, to the way I did the seaming 'after the fact'. Nothing too serious, as there will not likely be any tucking in of shirts.

Something to think about for the next pair. For future reference:
  • It is necessary to determine any side seam adjustement prior to cutting the waistband, and to cut the band exactly the size of the waistline.
  • Finish the edge of the waistband facing so it can be 'stitched in the ditch' instead of being folded under.
  • If elastic is going in the back, it will have to be sewed to the interfaced faced band before the facings are turned, or sewed to the facings only.

The vents at the bottom of the legs were challenging - not from a sewing point of view, but from a reading-the-directions point of view. I found them quite unclear fathoming back/front/left/right. Its one of those rotation things I cannot do well in my head. [as plainly can be seen from the waistband issue, which by the way I also messed up in the muslin] In the end, the job was quite easy.
  • I think a turned under finish on the front flap might be more attractive than overlock.
There were no major errors today, that is, up until the waistband thing, and the final try-on suggests taking in a bit at the hips, and letting out a bit at the waist and/or center back. I also need someone to check out the crotch fit, as I might consider a length adjustment above the crotch line. The pants are quite snug, but that is the style and look of the pattern. They will be quite comfy made from stretch corduroy. In the current more-poly-than-wool blend, let's just say they are not pants you would wear for a long drive.

Afterword: I let out the waist seam 1/4" on each side and lo, the crotch dropped just that little bit to result in comfort. It also seemed to help the back seam where the waist seems too low.

Time now to leave well enough alone. All that remains is the waistband fiasco, and the hems [which will be interesting around those vents] and fasteners. The side seams are done, pressed and bound, and the

The current pattern adjustment are:
  • Use size 16 throughout
  • Lower front and back crotch seam about 1/4 inch
  • Take in the back inseam about 1/4 inch [flat seat adjustment]
  • Take in outside seams at the hip [saddlebag area] about 1/4". I have no idea why this area needs to be taken in. One would think it would be the opposite.
  • Add 1/2" to the height of the back seam, tapering to nothing at the darts. Make appropriate adjustments to shape of the waistband.
  • Let out the side seams at the waist about 1/4" each side.
  • Adjust seams around the hips in the final fitting. There is a tendency to bulge just below the hip.

Saturday, December 9, 2006

SWAP #3 - Plum Pants


I didn't get sewing today until after supper, and that is not always the best time. However, I decided to cut out the plum pants. It's a Vogue Pattern, 2770. I had traced off a size 16 on Swedish tracing paper before making a muslin. When I basted it together, and tried it on, it was too small, so I cut the muslin as a size 18, using the grey striped polyester that Ali brought in the summer. By the time all the adjustments had been made, I did some measurement, it turned out I had pretty much recreated a size 16.

So, for the plum pants I decided to revisit my original tracing and make it in a size 16.

The fabric is from Ali's old stash, and matches my recent Haiku jacket in color. There was just enough left for the pants. I think it might be a wool/poly blend. Feels and acts like wool, but frays somewhat like poly, though not as bad as the muslin fabric.

The cutting went well, and the fly front was the best I have ever done. One change, the fly itself needs to have raw edges overlocked or bound before sewing it on. On pressing the front after installing the zipper, there seemed to be a bit of a shiny press mark, even though I had used a cloth -- more reason to believe a high polyester count in the fabric. It's not too noticeable, and I hope it comes out. After the fly I overlocked some critical edges, and basted the inseams for a fitting. I managed to get one side wrong side out, so I did not do any more this evening. Its good to stop when you start doing stupid things. However, in whatever fitting one can do with inseams only sewed together, it would appear that this is going to be a really good fit. Tomorrow I will sew the inseams up most of the way, baste the crotch seam and the outside seams. There may be an adjustment in the seat, but that will be it, hopefully.

Everything went well -- in the Zone as it were. It's nice when that happens. I'm looking forward to the vents at the ankles in these pants. I didn't do them in the muslin.

Friday, December 8, 2006

SWAP garment #2 - Finally DONE!


The Accursed Black Velour! After a day of rest, to let the shirt stew in its own juice for awhile, I tackled the hem this morning, with uneventful and satisfactory results, though the whole thing perhaps should be a bit shorter -- it won't be happening any time soon.


Yesterday, I visited Fabricville, and found a couple of black braids, which I purchased with the notion of decorating the neck edge and possibly removing some of the extra fullness there.

I also found a nice button to pull down the center front a bit, changing the shape, which was not overly attractive, and also using up some of the extra opening. The button, of course, precludes other neck jewellry, but that's a good thing as I don't have much of that anyway.

Both the braid and the button worked fairly well, and the shirt looks quite spiffy and quite dressy. There is a bit of a twist on the right side where the extra fullness is in the neck opening, and the shoulder seems to pull in a bit. This could be for any number of reasons from wrinkles on the underneath layer during cutting, to multiple changes in the shoulder and back seams to try to get the neck to fit. To the casual observer I think it looks fine. My summation of the major cause of the ill-fittedness and some of the many problems I had is that I used a fabric that was not recommended on the pattern. LESSON LEARNED.

Satisfaction index (maximum=10) - formerly about a 3, now about 5 with the improved neckline.

This shirt has been full of lessons, and has made me aware of several details about my own shape and also of my work habits and how I deal with frustration. What a great feeling, though, to have it done, and good enough to wear.

According to What Not To Wear, black should not be worn with bright colors, the blacks disappear, and the colors look cheap. Well, 2 of my SWAP colors and black and red, so fashion-challenged I shall remain.

Wednesday, December 6, 2006

The Agony continues

Its the third day, now, and I'm still working on the shell. After much welcome advice from group members, I re-tackled the edges.

First I removed the twill tape, then cut pieces of crossgrain velour for a binding. Watched the video, clipped 1/4 inch off the seam allowance, measured , stretched, and did all the fitting fun at the neckline. The 1.5" wide velour strip would not stay together at the edges even long enough to pin it in place. Each edge rolled under itself and totally disregarded the opposing edge. I considered basting the edges together, but didn't. This strip of binding became THE ENEMY.

I toughed it out, and pinned the binding on. There is a secret to how much shorter the binding is than the neckline. I've read a few articles, watched the video, and all you can get are suggestions. Only experience tells you -- sort of like how you know when muffins are done. Anyway, the pinned neckline looked like it was going to make gatherings in the shirt fabric, so I chucked to velour strip with a MIGHTY SIGH OF DEFEAT. Thanks to input from a group member, I re-considered interfacing the neckline and folding it under.

That process went quite well. I used a light-weight pellon fusible, not the slippery knit stuff. The edges stayed put and folded under nicely. Next time I would do it before sewing together the top, as it is quite painful to get the iron on the interfacing without mushing up the shirt pieces.

I basted. The neckline looked as if it would pop out a bit, but once stitched, it seems ok. I only did one row of topstitching. Tending to leave well enough alone. One bit of one armhole has a few wrinkles. That's because, after stitching the neckline I decided to remove the basting then and there, before stitching the armholes. Somehow, I removed the basting from the armhole I had not yet sewn! I did not rebaste before stitching it. Will I never learn!

Some days are just not sewing days. However, all that's left is the hem, and with luck I'll get to that tonight. What do I like about this? I like the darts, and I like the way the back fits after the bazillion changes I made to the seam line. I'm not crazy about the neckline, and the extra fullness there annoys me. I am experimenting with a nice button at the front to hide the mistakes.

This is not a pattern I will repeat in knit -- I still like the idea of having a basic shell pattern, so I might give this one a try in a woven fabric -- with suitable modifications.

Tuesday, December 5, 2006

The Agony Begins

The agony begins! And its only SWAP garment #2. The lesson is humility.

I am making a simple panne stretch velour sleeveless shell. Two days later it is still not done. I am trying to finish the neckline and armholes as simply as possible. I made something similar a couple of weeks ago, and someone suggested using Steam-A-Seam to turn under the edges, then sewing them down. I did that, and it worked fairly well, but the fabric stretched during the "Steam" part the shape has gone all wonky. This time I thought I would try to be a little more sophisticated.

My sewing mentor suggested running twill tape around the seam allowance, turning under and stitching. I thought twill was too hard for the edge and would not go around the curve very well.

The lady in the quilting shop suggested using a stretchy, clear, plastic-looking tape. Since the neckline is a bit bigger than it should be, I though that would be a good idea. NOT. Turned out awful and the machine would not sew through the tape and the velour without gathering the whole shebang into a bunch.

Lesson: Trust your mentor. Back to the twill tape option. I sewed it all onto the neckline thinking I was testing on an armhole. Turned it under, basted all in place. Tried on. The edge rolls outward and looks dreadful. Even if I sew close to the edge I think the finish will look cheap. So much for this advice.

My next option is to cut off the seam allowance and bind with self fabric, cut on the crosswise. Is this what I should have done all along?

My experience with knits is minimal. Unless I get some better advice from the forum, I will fold the binding, line up with the cut edge, stitch on with a narrow seam allowance and turn the seam down and the binding up, then stitch it down on the right side through all layers. Needless to say I am still sergerless.

Monday, December 4, 2006

SWAP garments #1 and #2

I was determined to finish a SWAP garment on Day One of the SWAP sewing time. I wanted to wear my red velvet skirt to a wedding reception Friday night, and I was able to do that. There were a few glitches in the construction, and the details of that project are posted with my SWAP photo album.


My satisfaction index for this project is about a 7.


I was away for the weekend, and yesterday (Monday) I started on garment #2. A black panne velour sleeveless shell. I had previously modified the pattern to move the bust dart so it angles up from the waist, and to lower the bust as always. It is a New Look Pattern 6483, and I have not used that brand before. I measured and drew off a size 14, with a 16 front below the armhole. This is my usual adjustment. At least as 'usual' as I can say to date.

In all due respect, the pattern is suggested for woven fabrics, not knits, so I was prepared for some possible fit problems, and thought perhaps the side or back seams would have to be taken in a bit. What I was not prepared for was that the neckline was vastly too large - even given that I had adjusted the center front to delete about a half inch of fabric at the neckline. The shoulders of the garment would have to be pull to the sides past my bra straps to make the neckline lie flat.

Fiddle-dee-dee. I poked around for awhile pulling up the shoulders, taking in the back, and trying all sorts of options to make some sort of fit. This is the part that I have most difficulty with, especially if I have worked to make fitting adjustments, then in real life (as opposed to paper fitting the pattern) things don't work out. I just don't have the experience to know what to do about fitting issues.

I had previously made a similar top from a Burda WOF pattern, and messed it up in turning under the neckline edges. Apart from that, and the resulting twistedness from the stretching, it fit quite well, and I love the look of the velour on the body. Instead of reusing that pattern, I wanted to try the version with the angled dart, and it was a spur-of-the moment thing to use the velour instead of making a muslin from a woven print.

With some help from my husband, who is not particularly handy with pins, but whose heart is in the right place, I got the shoulder seams rearranged so that everything looked as good as possible. A few more rounds of basting and re-basting finally got the back seam in place and the shoulders acceptable. There is still a bit too much fullness in the neckline, and I will likely have to design a decorative feature to hid the wrinkles. Get a lemon - make lemonade.

I love the look of this velour, and I am so glad I also have a piece of ivory in the same fabric. It will be a cowl neck top.

I learned some things about working with velour.
  • Cutting on a damp day works better than a dry day, far less static.
  • Seams do not stay even (ie edges will not stay lined up) even for basting. I had to remove the back seam and reposition everything and even with many carefully placed pins, the edges wanted to slide apart leaving one seam allowance narrower than the other. Pulling stitches from a knit is a pain, so watch this carefully, baste carefully, and sew on the SA side of the basting.
I also learned some things about my body.
  • Right shoulder is lower and much more forward - computer mouse side.
  • Right upper back is wider than the left side. Very obvious in the back armhole of the tank top. I will have to make the SA much narrower there to accomodate.
  • I already knew one shoulder seam was 1/2" longer than the other, but that does not seem to show.
  • In the last 2 garments, the twist in my torso seems to make the right side of the garment feel smaller than the left. I still have to explore this - is it true, or just sloppy seaming or off-grain cutting.
I think the next thing I should learn is not to be quite so picky. None of the above is majorly problematic. Only I would notice.

I'm now in a conumdrum about this pattern, though. Should I start over with a smaller size, should I use what I have and figure out how to reduce the neckline, should I make what I have in a woven to see how it fits in the recommended fabric. Probably all of the above.

Wednesday, November 29, 2006

I Guess that's why we do Muslins

Finally I had procrastinated enough of the day away, and decided to work at something. Anything. There is a host of UFO's now ahead of me in preparation for the SWAP, and actual SWAP stuff.

Yesterday I made a trip to the local quilt shop to get some thread to match the strange green-grey cotton I am using for the muslin for the Burda WOF shirt. I think I am almost a perfect Burda 42. That is if you don't count the fact that I need a 1" to 1.5" bust lowering, and a size 44 front from the armholes down. Not bad, though, compared to some others I have tried.

The top has tucks, and the fabric is very very soft and fussy to work with. All is well though. The tucks look good, the seams fit nicely, now for the collar.

Remember all that interfacing fuss. Well, the corners where I clipped back the interfacing show the no-interfacing bits, so I had to paste on a piece in one corner of the collar. Misread the collar directions, and spent 2 hours trying to perfectly fit a collar onto the neckline when I had sewed parts of it together. It was going to be a fascination and very modern and funky collar until I realized the picture did not show anything unusual. What a waste of time and brain power.

What an adventure fixing it after clipping the corner to nothing and then having to re-create a seam allowance. But I think it will be a nice shirt, and the SWAP shirt will look great. I think I'll do it in black.

Yesterday I finished cutting the Vogue Tomatsu sleeveless shirt. I later realized that it is intended to be lined, so it needs lining pieces before it can be properly sewn. I think there is enough fabric, but I am going to leave this one for awhile. I think it is wise to make the muslin just before making the garment, so there is at least a hope of remembering some of the fussy points. the fussy point in this will be to see if the bust lowering works. I should have just cut out and lowered the bust parts, and added the length at the L/S lines. Maybe it would not have mattered. I'll have to look that up.

Got swatches from Julie today. Nice black rayon jersey, and a brown sage wool that would make pants to die for. Shall I re-do my SWAP yet again??

Tomorrow is Thursday, and I have a tai chi class, and I have to send out a tai chi email newsletter. I also have to decide what food to bring to the wedding reception, and pack for the weekend in Halifax. On Friday, I have all day to sew if I get everything else out of the way tomorrow. Will I get the red skirt done in time to wear to the reception. If so, what will I wear with it. Suddenly with all this sewing in the wings, and all that has been done, still nothing to wear. .... especially no shoes.

Sunday, November 26, 2006

The SWAP gets moving

Finally almost all the SWAP decisions are made. At least I am now working from a surfeit of ideas rather than a dearth of them, so it's easier knowing I have lots of choices that are possible. There are still some decisions, and no doubt more changes. I discovered a couple of important things recently:
  • I am often hot, therefore making long-sleeved garments is not a great idea unless they can be worn over a shell or tank top. Thus, long-sleeved knits or other polyester items are probably not practical in the SWAP.
  • I do not do well when the entire plan has to be laid out ahead of time. For some reason I need anchors that I can work around, rather than having all the options open all the time. This is because of my inability to settle on a reasonable decision. I keep looking for the very best options, and in the process waste a lot of time. For this reason I have decided to cut the red velour skirt. This makes it FIXED as a project, along with the OneSeam Pants. I am also going to cut the print skirt later today. I also think part of this is my unwillingness to close things off. I always like a few options to be open. Funny how we learn so much about ourselves when doing something like this.
All my UFO's are done except for hemming the grey pants, and that's encouraging. Mostly for the past few days I've been working on muslins.

Underway at the moment:

Soft Egyptian cotton greenish muslin for the Burda WOF "soft" blouse.
It's ready for machine sewing but I dont have the right color thread. Store was closed when I got there, but in the adjacent dollar store I found 50 yds of ivory lace for $5. Didn't buy it as I don't use much lace, but I may go back and pick it up 'just in case'.

Basic shell SWAP print. I moved the bust dart so it starts at the waist.
The pattern is traced, altered and cut. I'll sew up the front and back, make necessary pattern adjustments, then find something for the back to practice making it reversible. I am using my SWAP print for this as I don't want a print top in the actual SWAP. I'll end up with a print shirt this way, and will be able to add a different colored pant to the SWAP lineup. If I get really moving, I'll be able to wear the shell to the wedding reception with the red skirt. (see below)

Vogue Jean Jacket print muslin.
I decided I should at least do some testing of this Bettina Vogue pattern as there are so many pieces. It's billed as loose fitting, and I don't want it too loose. In a flash of genius I decided to make the muslin in my SWAP print as I have thoughts of lining it with that print anyway. If the muslin fits, I can use the pieces for the actual lining. If it doesn't, I will still have a so-so jacket if I choose to finish it. I will probably opt for the 'use it as a lining' option as the print is quite busy for all those topstitched seams. They would be lost in the whole picture I think. And, the wool crepe will definitely need a sturdy lining I think to make it look right as a jean jacket.

This afternoon I placed and cut all the pieces for this muslin -- everything except facings and second copy of yokes. I think I'll baste in together for a fit test instead of actually sewing it up. Then I can sew later in whatever manner will be required for the SWAP jacket lining. Have to be careful not to "sew" before Dec. 1 on an actual SWAP garment.

Muslin for Vogue 8077 sleeveless shirt, Tomatsu design.
For some reason I keep coming back to this shirt, so I decided to use the leftovers from the Pants in the same pattern. It's a grey polyester stripe, so it will be a pain to work with, especially if there is any ripping out of seams. I should probably bind all the seams right off the bat. I made a 1" bust lowering, and decided to go with a size 16 overall. It's a princess style which is foreign to me as far as bust adjustments go. The last time I tried it I had bumps all over the place and gave up the project for a bad idea. Tonight I laid it out and found I had just enough fabric. Too late to trust the cutting in the bad light - so I'll do it in the daytime. The pattern is supposed to be lined, so it might work out as a reversible item.

The SWAP plan so far: It's obvious since typing this that I still need some work on my top decisions, especially with respect to the pattern choices.

Bottoms:
  • Ivory OneSeams [cut in M - wide leg]
  • Red Velour 6-gore skirt [cut in Size 14]
    • Tonight I took the pattern pieces off, marked the few notches, and pinned the skirt together. It fits fine, being quite stretchy, but I am disappointed that I shortened it a bit, and it is nowhere near as full as I thought it would be. The front panel should be much wider for good lines. I feared it would be too full for the fabric, but I could have made something much fuller. It will be ok, but not as spectacular as I had hoped. I think the fabric is actually less substantial than I thought. It will make up quickly on Dec. 1 when the SWAP sewing starts, and maybe I will even wear it to a wedding reception I have to go to that evening. Shoes, of course, I have no proper shoes for all these skirts I am making. Live and Learn. I am glad I did this, though, because this skirt will get much less wear than my print one, which was going to be a variation on the same pattern. Now I think I will make the one with the bias flounce.
  • Print 6-gore skirt [needs pattern traced - see above, needs different pattern choice]
  • Pants undecided [looking for a beige/brown mix that will go with red/ivory/black. or some other color different from the 3 basics]
  • Fallback: Purchased black pants, or make a pair of black cords
  • Options: Add a reversible skirt of some kind
Tops:
  • Black velour shell, crossover or cowl neck
  • Ivory velour shell or cowl
  • Black viscose long-sleeved "soft" Burda
  • Ivory viscose - pattern undecided - would make a nice overshirt, but too long for the jean jacket - may have to go to phase II
  • Red cotton print - zip front like black jacquard test model
  • Swiss dot ivory cotton - pattern undecided - looking for something with ruffles
  • Options and fallbacks:
    • Black jacquard shirt recently completed
    • Reversible vest still being imagined
    • Fabric ordered from Wazoodle, and swatches from Julie
    • Find a matching red knit for a crossover top.
Jacket:
  • Vogue Jean Jacket in red crepe.
  • Options: reversible quilted jacket to be made in March with Lynn


Tuesday, November 21, 2006

Velour 5 - Betty 4

This one I lose. I made a velour tank top from a Burda WOF pattern by way of getting the fit right. The fit was fine, and though I am inexperienced with knits, almost everything else turned out very nicely. However, turning under the edges of the neck and armholes was a challenge. Failing to find the recommended Fuse and Fold product, I tried Steam-a-Seam upon the recommendation of someone on the forum. It seemed to work fine, but when I tried the top on, one side of the neck was all baggy. I heated, unglued and re-fried the edge, but all the fullness did not go away. So it's an almost-ok top. Fine underneath something, but not good enough to wear by itself. Also, the front is too low, and the pattern neckline was too pointy at the bottom for an effective fold under finish.

There also seems to be a bit of a twist in the garment, so I expect the garment is not entirely the same on both sides. It was slippery and slidey to cut.

Today I visited my local sewing guru who suggested twill tape, and described for me exactly how to apply it on the seam allowance, with the edge on the seamline, stitched down the middle of the tape. Fold the edge in and topstitch. She suggested that anything really stretchy should have twill tape anywhere you don't want it to sag. Especially shoulder seams.

She also told me there is fusible twill tape. Not likely around here in the boonies of Eastern Canada, but perhaps somewhere on line.

As well, she gave me some cutting suggestions for such fabric: Pin a sheet of pattern paper, or blank newsprint to the fabric before cutting...something you dont mind cutting through when the time comes. I am hoping to use this velour for a cross-over top in my SWAP, and a pair of One-Seam Pants to wear with it for Christmas morning, so I need to get over my frustration with working with it.

Interestingly, though, it sewed up fine in my machine, with no pulling or stretching. I am quite proud of my hem finish in fact. I do not have a serger (yet).

Today was "Sewing Tuesday" with 3 of us working on various projects. I traced a Burda WOF pattern and got some help with the fitting. It's muslin version will be some soft blue Egyptian cotton which my daughter brought in the summer. In the SWAP in will be black or ivory poly/viscose blend which is soft soft soft.

Sunday, November 19, 2006

It's Done!!

Burda 8360
The Black Polyester is finished and looks and feels quite nice - except for being polyester of course. If it gets warm in here, it will be coming off in a flash.

What I like is that the shirt can be worn by itself, or open, over a tank top. The latter is more likely how I will wear it most of the time, as a sort of light jacket.

There are a few inequities in the garment, and a few things about the pattern that I would note for next time around, but mainly I got the fit right, and that is what I was looking for.

Stuff to remember:
  • Do the sleeves as per the pattern. I think it will make for neater seams.
  • Sew the sleeve hems before working on the sleeve cap.
  • Consider a full lining of both fronts as the facing is a bit narrow for wearing the jacket open.
  • The hem should be seamed into the front and turned inside out before finishing, which affects the topstitching -- has to be done before the topstitching.
  • The length of the facing has to be exact, or at least not longer than the hemline.
  • Think doing a version with the zipper all the way to the bottom.
  • Could this be done with a stand-up collar (mandarin type style?)
  • Make sure collar is evenly placed at neckline so one side is not wider than the other.
  • Come up with a better way to put the zipper in. Steam-a-seam may help.
  • With heavier fabric, facings and undercollar could be something lighter.
  • The pattern has side vents which I did not put there. It would look nice, and prevent the slight tightness in the hip area. I have a shirt with those vents, and it sticks out at the bottom and looks silly. That's why I avoided them. Here, they might just work.
General things not specific to the pattern:
  • BASTE
  • Use short stitches at collar points, dart points and when finishing off a line of stitches.
  • Avoid clipping thread ends. Tie them off when finishing or starting.
  • When fiddling with seam and hem binding, a truly nice finish requires that the binding be straight, and sewn an equal distance from the seam edge. Hem needs to be exactly equal all the way around, or made to be so. Careful cutting and handling all the way through is necessary for this. ALso using proper bias or seam binding of some sort
  • Tricot seam binding (Seam so Soft) does not go on easily, and does not look great once its there.
  • DARTS need some special attention. I can never get them exactly right and they are awful to take out and do over. I think I prefer a dart that angles up from the waistline. Maybe I"ll try that next time.
I'm very happy with this shirt, which is one of the first patterns I bought when I started sewing, but never got around to trying. I think it will be much more practical in a light cotton or linen, but I am pleasantly surprised by the outcome in this heavier fabric.

Now. What's next???

Saturday, November 18, 2006

Polyester: 10 -- Betty:11 I am winning!

I am winning the polyester battle. Today I adequately set in the sleeves, and happily bound all the remaining edges in the shirt. How intensely satisfying it is to sew those frayzzles into the seam binding. This shirt has required as much time binding seams as sewing other stuff, if you don't count the time ripping out seams.

Today I failed to follow my own advice and did not baste the sleeve in. I had to rip out about 3", and redo a couple of other places where things weren't quite right. Maybe NOW, I've learned my lesson. I basted the side seams tonight, and did a fitting, then took the basting out and repinned the back seam allowance wider. Now its pinned into its final resting place, and I SHALL BASTE in the morning. Once that's done, all that remains is the sleeve and bottom hems.

It does not sound like much for the effort of a day, but I did spend some time photographing some details, and my Haiku jacket, and of course (sadly), one cannot be sewing the whole day long.

The best thing of the day, though, was trying on the shirt once both sleeves were in, and being totally surprised by how good it looked on the body. The shiny black jacquard actually is quite attractive, and the style is very versatile, serving as a jacket or a shirt. With the zipper undone, over a tank top, it will complement many an outfit.

I also discovered when trying it on inside out, that the lines of the front facings look very nice as a decorative feature, and when I make this for my SWAP, I will put the facings on the outside and cover the edges with some braid or tape of some sort. Some variation on that theme may be the answer to a reversible garment.

Wow, I'll have one TNT after this episode. Decisions now about what to make it out of next. Wonder if there's enough corduroy for both this and a pair of pants?

Friday, November 17, 2006

Completed Project and Wasted Time

Today was not particularly productive in the sewing department. I think I need to start getting up earlier, as late night stitchery is too risky.

Haiku finished and worn:
I wore my Haiku II jacket to a play tonight, and was complimented. I still think it's too big, and may try a size smaller if I do it again. It was not included in my list of Unfinished Objects, because I had completed it just before starting this blog. There were a few details needing work, and I spent a couple of hours this afternoon tending to that. I've added a few pictures of this garment, if I can get them to fit on the left side of this text, it will be a miracle.


What was involved was the result of the fabric I chose. The fabric was an embroidered wool/poly blend - mostly poly by the way it behaved. Because the jacket panels show the reverse of the fabric, the embroidery was obviously the 'wrong' side. Therefore, to keep the panels clear and neat, I picked out all the embroidered flowers from the panels, leaving a nice contrast to the rest of the jacket. The color is a dark plum. Sun vs. shade makes a big difference in the color in the photos. I guess I should be more careful in future to make things match better.

Progress with the black zippered shirt.
The picture below illustrates why I hate polyester. Note the shoulder seams with their nice Hong Kong finish. There is a great satisfaction in taming these monstrous frazzles.

This pattern definitely needs an adjustment to the zipper instructions. It is a front closing covered separating zipper which is supposed to be installed in each side separately, between the front and the facing. All this with nothing sewn down first. Most zipper applications (except invisible) require the seam to be basted until the zipper is in place. With this one, you magically attach it behind the folded-under front seam allowance, then fold the facing seam allowance under and sandwich everything together. The facings and the fronts are attached except for the zipper opening, which flaps open begging your undivided attention. Great if you have a nice crisp fabric that will press in place and stay there. BUT, you will recall that we are working with antagonistic polyester here! I think I might write a Pattern Review for this once I make it the second time. There does not seem to be a review as yet on the PR website.

I finally got the zippers all basted and lined up, but next time I would totally revise the method. I would also use some Steam-a-Seam, and I would BASTE more. Did I say I would BASTE more? For 5 minutes of not bothering to baste, I wasted over an hour taking out stitches of black on black, sewn through 4 layers and a zipper tape. That was the biggest lesson for today: Take the time to baste, to change to the right presser foot, to double check, to not think there is an easier way.

After getting the zipper in, and the topstitching done around the collar and the fronts, I tackled the sleeves, and properly put in the 2 rows of basting. One sleeve is successfully installed, and the other awaits a fresher morning mind. It remains to be seen whether my "easier way" decision to do the sleeves before the side seams comes back to haunt me. A respected seamstress suggested this method, and it certainly seems a bit easier, but it may not turn out that way in the long run.

A try-on at this point, with only one side seam pinned, suggests I will need to take in the side seams in the back, which means that my shirt is effectively size 14 throughout, except for the front side seams.
It also means I may just have to use a size 14 pattern throughout, and do a FBA instead of using the size 16 side seam measurements. I think this style might look good with some back darts, but I probably won't bother doing that this time around.

SWAP Cogitation
The SWAP collection is undergoing yet another rewrite. I think I will have to forego my print skirt until Phase II, where all things don't have to match everything. If I only have green, black and ecru bottoms, I think I can find something to better coordinate with the greens, shades of ivory which will look great with the red jacket, as well as the green and black. Perhaps there will even be a shade of blue or a green print that will pop up. I just have no natural color sense so I am finding this part of the planning very hard. There is some great insight on the forum. I have to keep this in perspective, and not make it into something difficult. So far, its been really fun, but I want to start making things, and the rules say you have to have the plan in place first. All for your own good of course, so you won't box yourself into a corner.

Thursday, November 16, 2006

Pictures, you say.


I tried to photograph my SWAP fabrics tonight. Arranged them nicely on my stair railing. The light was not right, and the flash did not improve the situation. I will try again in the morning. Meanwhile, here's the best I could do:

Though there are some similar colors here, the textures are all different. I discovered in this process that I am really a texture person. If I were a color person, this would all be so much easier.

On the bottom from L to R are
  • faux suede for skirt,
  • print for skirt,
  • green corduroy for pants,
  • ecru (darker than it looks here) nubbly linen
On the top are my fabrics for tops, which dont show up well at all: L to R
  • ecru linen
  • soft black poly-viscose, very drapey
  • greenish taupe (greener than it looks) poly, very drapey
  • print again
  • panne velour
One top is missing of course. Hopefully I will find a knit of some sort to "top" the whole thing off.


Along the top is my lovely red wood crepe which will be a jacket to coordinate with all.

Love Burda, Still Hate Polyester

I spent all afternoon doing about an hours worth of work on the black jacquard shirt. In spite of cutting it out with a pinking blade, it frays all over the place, mostly over me and my clothes. I went off to tai chi class this morning needing a wipe-down to get rid of the little black bits that fell out of the pinking points. Better that than the long theads which followed, in spite of care-taking to not handle the stuff too much.

I am practicing Hong-Kong seam bindings, and spent about an hour putting lovely black satin bindings on the shoulder seams. Was it worth an hour? Not likely, but it was fun. Besides, it gave the rest of the garment a chance to ravel some more. I don't particularly like the look of seam edges overlocked on my regular machine, though I may have to do that anyway, as binding seams takes a long time, especially for a casual garment. But I hate those frayed, home-made looking edges that happen with almost any fabric. The pictures in the books always use some beautiful stiff tightly woven edge to show the zig-zag or stitched under edges. Welcome to polyester folks. It has a mind of its own.

This is my first Burda Pattern (8360) except for the velour tank top aforementioned. It seems to fit better than other, or at least require less adjustment. Maybe I'm getting better; I'm certainly getting smaller, so that helps I suppose.

The pattern is not made for the fabric I am using, so I have a rather bulky collar assembly, however the fit is right, and that it what I am doing this for. I moved the shoulder seam 1/4 inch to the front, which made everything hang well. Don't know what this will do to the sleeve gathering, but it should not be enough to make a big difference. Hopefully.


While I was admiring myself, or rather my shirt collar after clipping neckline seams, and pressing carefully, I was quite disappointed to discover the the width of the collar on one side is 1/4" more than on the other side. One should never be too proud. I have no idea how this happened as I did pull it up at the front corner before sewing, and make sure it was in the right place. Fudged a bit to correct it somewhat, and decided it was time for a computer break. Now my computer area is also covered in black polyester threads. Time for a serger I guess. It would make me a good Christmas present.

Wednesday, November 15, 2006

Polyester, Interfacing, and Procrastination

Today got off to a slow start, sewing-wise. I finally got back to the black jacquard shirt and got it cut out quite without incident. I used the pinking blade on my rotary cutter which I may turn out to regret. I started with the interfacings which put me in a muddle requiring a computer break.

The Pain of Polyester
This is a lovely fabric which I bought at Fabricville in the summer for $2.99 a meter -- so a great bargain for a test garment. I can't say that I really like jacquard -- looks like old-lady fabric to me, even though some might say I AM an old lady. I bought it shortly after I started sewing and was experimenting with various things. Also looking for bargains to experiment with.

So as I work with this, I realize what I have always known, even when I did not sew: I really don't like polyester! I find it uncomfortable to wear in hot weather and cold. For spring and fall it isn't too bad. I have a few things that are fairly comfortable most of the time; but my goodness, there must be a better way.

I try not to buy polyester fabrics, but it's like not buying pre-packaged food at the grocery store. It doesn't leave much to choose from. I have some poly in my SWAP -- the shirt stuff I bought yesterday, a green faux suede, the panne velour and a poly-viscose black which has yet to prove itself comfortable or otherwise. The rest are cottons, linens, and a wool crepe....so far.

Anyway, I will tough this one out, and the shirt ultimately will look fine. It's only a muslin anyway---and if I can make it of poly, then surely I can easily make it from whatever else is here.

Interfacing Woes
Toughing it out. Yes. Interfacing is not one of my favorite things to do. I recently gave up on fusible interfacing because it shrinks up, sometimes under the iron, and it seems like a great bother to pre-shrink, steam or whatever the rules are about interfacing pre-treatment. I think I have a mental block. Anyway, for this shirt, I decided to use a piece of fusible from my stash, cut out the facing bits and didn't have enough for the collar. Ah-ha, I said to myself. Use some of that knit fusible you have upstairs. It should be better for the collar anyway. (Why I thought it would be better is anybody's guess because interfacing is one of the gaping holes in my knowledge base.)

Carefully I cut the collar shape, then read the directions that said to trim the seam allowances to 1.8" Not to worry. Still on the ironing board which I was using for my cutting surface I trimmed the edges of the slippery slidey knit, which I discovered leaves all sorts of bits of fuzz on the black jacquard and on the ironing board cover. Without thinking much more about the fuzz, I carefully followed the rest of the application directions, using a damp cloth and appropriate pressure. I even remembered reading somewhere not to move the piece until it was cool.

While waiting, I thought I would use my iron to steam the pellon fusible pieces to be sure they would not shink later. No problem except that this is what I hate about preparing interfacing. I interfaced the back neck facing, and was about the steam the second long front facing. I picked it up and noticed the edge had gone all shrunken and squishy. Remember, I am working on my ironing board. I had taken the hot pressing cloth and placed in in the vicinity of the pellon facings. I tugged a little and managed to rip the stuff. Good grief.

Back to the drawing board. I think I'll put some sewn-in stuff in the facings, or maybe even just an extra layer of Fashion Fabric. I guess I just have to go off and study this topic, but whatever I read seems so daunting that I put it off till another day.

Meanwhile, I decided to brush the fuzz off the collar piece. Indeed! The fuzz of course, was from fusible knit -- and had nicely fused wherever the heat hit. Ah yes. Thinking IS an important part of this journey.

Still no answer from the forum on my seam-edge interfacing, but I did find out on another message board that "Fuse and Fold" is a bias fusible that has a chain stitch down the middle for stability. The writer suggested using twill tape instead, but I'm not sure that would work in this application. Maybe I can find a source of fusible bias somewhere and give it a try.

Time for supper and another tai chi class, so likely not much more progress today.

End of Day Progress

After 10:00pm is not the best time for sewing, as evidenced by the seams being picked out, but I did start the shirt, and got the interfacing finished, the edge of the front and neck facings bound, and the collar sewn together and topstitched. Only 2 short seams had to be completely removed and redone.

It's an easy pattern, and tomorrow should see most of the shirt finished -- with luck and a little time, then I will get back to the velour tank top and see what can be done there.

Tuesday, November 14, 2006

Testing 1-2-3


1. Panne velour tank top from the Burda WOF November Issue, Pattern #111:


Today I decided to finish this simple project, except that I do not know what "Vilene/Pellon Fuse and Fold" is, or exactly how it is to be applied to the neck and armhole edges. I posted a message to Stitchers, so I know I will get a response sooner or later. I find it odd that googling that product produces essentially nothing useful.

I have learned from this tank top that velour is NOT a good fabric to test a pattern with. It is too slippery, too hard to cut carefully, and when all is said and done, there is really no guarantee that both sides of the garment are the same when you're finished. In spite of flaws, though, it looks really sharp, and is quite forgiving on the body. I did get a bit of pattern adjustment settled, but I will have to do another 'muslin' in a more cooperative fabric to finalize the shoulder seams. But, I've travelled a short way down the road to a TNT Pattern.

Because of my interfacing dilemma, I left the project until an answer comes my way.

2. Rearrangements to SWAP fabrics:

I took an early morning trip to Walmart, where I NEVER go, to check out their fabrics. There, I found something for a drapy shirt for my SWAP in a greenish taupe. When I got home, I concluded that the 'ecru' color of my cotton/linen blend was not working well with the other colors. Moved my Egyptian Linen to the 'bottoms' category, and moved the creamier color out. I have it already cut out for One Seam Pants, so I will use it as a Muslin. It will ultimately coordinate with most of the items in my SWAP, so definitely not a lost cause. If the One-Seams work out, I'll include a black pair in my SWAP....maybe.

3. Testing the poly/viscose:

Today I also tested the poly-viscose blend that feels so soft and wonderful, but which is supposed to be dry cleaned to prevent bleeding when washed. I tried a piece in water, and a piece in vinegar/water. I could not see much difference in the amount of bleeding, so I will throw both of them in the wash with some dark towels and see what happens. If the fabric washes ok, I will use it, but perhaps not as planned. The plan was for it to be half of a reversible skirt. Not a good idea to have one side run into the other.

4. De cluttering and starting another test garment.

I cleaned up my dining room table from ends of cutting, and parts of various patterns and fabrics cluttered about. Sometimes it feels good to just sort and order things. After this I was able to start tracing a shirt pattern for my SWAP, fiddling with adjustments, and having to stop to get supper. This shirt I think I will test on a red cotton that I deleted from my SWAP because I can't see wearing a red shirt with olive pants -- both are too strong, and too complimentary to go well together -- but, the red will go well with my print, and with black pants and ecru linen pants, so it, too, will be a Muslin that becomes add-on if all goes well.

Sometimes it feels like I have to do a SWAP to do a SWAP.

Later in the evening, after a meeting at the Quilting Guild, i finished tracing the Burda shirt pattern, and pinfitted it. It seems to fit amazingly well, at this stage anyway. During tracing I added an inch above the bust line to accomodate a low bust point, and I traced a size 14 top, with size 16 side seams, adjusting sleeves to accomodate this. During the pinning, I had to take in the back seam to almost the size 14 point, so there will be some additional adjustment there getting it all to hang correctly. Back and shoulders have been a problem in patterns I have tried to far. Until I tried Burda, I have needed an FBA, or a 14/16 combo of sizes. I am still trying to work around the simplest way to accomodate a full bust and narrow back. Maybe Burda will be the answer. I have read somewhere that they are designed for a C cup.

Before heading for bed, I laid out the pattern on some black jacquard that I had originally purchased for my SWAP, but which proved to be the wrong color of black to go with my print. I decided to save the red cotton for an upcoming course on reversible quilted jackets.

Current Clothing UFO's:
  • One Seam Pants (muslin for possible black pants in SWAP)
  • Grey Pants (just need hems) - this was a muslin for the green cords in SWAP
  • Velour tank top (muslin for something in SWAP as yet to be determined)
  • Black jacquard zip front, short sleeved shirt. (muslin for print shirt in SWAP)

Sunday, November 12, 2006

SWAP Planning Merry-Go-Round

Welcome to my SWAP blog. Who knows how long I will be able to keep posting and sewing, but right now, it's one way to organize my organization, which is going way more slowly that I expected, and spiraling into various unexpected directions.

I think my SWAP color scheme is almost settled. I've been muddling a lot, changing my mind about which colors are the 'main' ones, and which are 'coordinating;' about whether to include the print as a skirt or not; about which item will be reversible; about whether to try to include a fantastic fur-trimmed vest that I found in a magazine picture.

My plan has been stalled by the notion of a 'theme' or purpose for the collection, even that it should 'be' a collection -- my goodness, what is that! Then there's input from a friend that all jackets cannot be worn with all skirts -- short or long, yet another decision, or maybe more.

My theme is "Clothes for home and neighbouhood." My intention is to spruce up what I wear around the house, shopping for groceries, going to the dentist, heading out for a local lunch or a visit to a friend's house. Nothing fancy, but a little bit more class than my usual baggy pants and T-shirts.

It's good to have family and friends who are willing to be honest, thus I deleted a lovely piece of dupioni purchased from Julie, and a wonderful red cotton from the local quilt shop -- neither of which were quite the right coordinate for my olive greens. I have found it unbelievable how much work (and fun) it is to go through this planning process - far more work than the sewing I think. I've never had any fashion sense, and it sure shows now as I struggle with colors and textures and patterns.

Hopefully, I will not change my mind on the following:

  • Olive green corduroy pants
  • Ecru linen pants
  • Olive green faux suede skirt
  • Skirt from my floral print, a red/black/olive/taupe poplin
  • One of these skirts reversible with plain black poly/viscose

  • Red wool crepe jean jacket interlined lined with my print

  • Black velour, 3/4 sleeve knit cross-over top
  • Ecru linen, zip-front short sleeved shirt
  • Print top from main print

As yet undecided:
  • Taupe knit top
  • Ecru long sleeved drapy blouse
  • ??? another jacket?; the cool embellished vest? a muted green something-or-other?

Obviously I still need at least one more trip to the fabric store.

Soon I will be revising my story-board, and adding pattern info. The original version is at www.kodakgallery.com/bettyfleet in the Sewing album.