Saturday, October 20, 2007

ThisWeek

This beautiful fall weather has interfered with my sewing week. I actually got a sunburn sitting on the deck one afternoon. Today it is raining. We had a wild weather night, and one of my carefully piled woodpiles fell totally over in the wind. I guess wood-piling is not my strong suit.

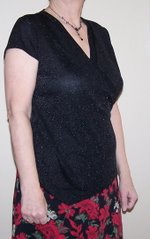
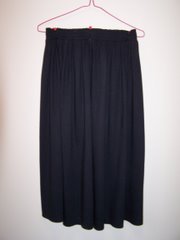
T-shirts: Yesterday I managed to finish the two Jalie T-shirts and a skirt that had been waiting for hems. Knits still elude me, and the fit on these Jalie shirts is not perfect. I blogged about these fitting issues earlier.

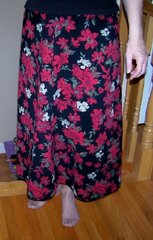
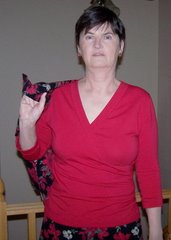
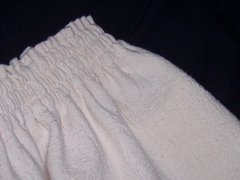
Knit skirt: The skirt looks ok, but it has a wide (3.5" or more) contoured waistband at the top which I have decided is not flattering on me. The T-shirt stops about an inch above the band, drawing attention to the 'line' created near the hips. Still, it's nice to have a shirt and top that are the same -- a dress in effect.

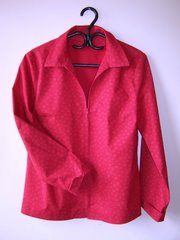
New Project: Earlier in the week I cut out a 'test pattern' for Simplicity 3789, a princess seamed shirt, the view with the cross over front.


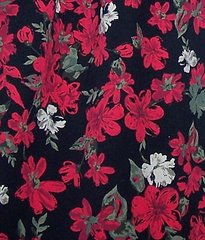
This is my first Simplicity B-C-D pattern. The fabric is from my stash, and is an ivory pashmina-type fabric whose composition I forget -- includes some rayon I think. I washed it, even though it says dry clean only. It's very soft, but seems to cling to itself, and will be a pain to work with as it tends to stretch every which-way. I spent a long time with the pattern making the required adjustments, hoping to turn this into a TNT shirt pattern, as there are several styles in the envelope. Mostly I just want to check the fit.


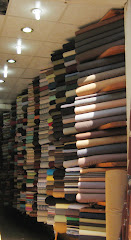
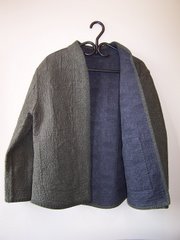
Donna Karan Cape: My package from "The Sewing Place" came with the grosgrain I ordered for the Donna Karan cape. The color is not a perfect blend, and I am still on the fence about using it. Originally I thought navy would be best, but then figured it was too much contrast, so I ordered a burgundy color that I hoped would work. I need to consult someone with a better color sense than mine. At the moment I am leaning toward omitting the grosgrain completely. I still have not solved the problem of the arm opening, but I spent quite awhile experimenting with various options. I think I need to make this decision and get on with it.

Decision Made: I consulted with my husband, who has a great eye for color, and the grosgrain simply won't do. It has an orange cast to it, whereas the fuchsia wool has a definite blue cast. Navy ribbon looks great with it, so now my decision is whether to re-order grosgrain and wait for another 10 days to get it, or to forget the grosgrain completely. I guess my decision is NOT made after all.

Sunday, October 14, 2007

Reflections on a Sewing Plan #2

Speaking of reflections:


The last post has generated a bit of interest, so I thought I should round it out with a couple of previous points that have come to me since I started sewing again. In the past year-and-a-half I've learned and re-learned a mountain of stuff, and have tried to make planning part of my sewing passion.....not altogether successfully, I might add.

The following points, however I hope I have taken to heart:

Reflection #6: Stifle thyself. There will always be more fabric. There will always be another sale. I remember vividly my first visit to Fabricville after at least 20 years of not sewing. I was overwhelmed by the selection, and afraid the sale would end before I could make up my mind. At the same time, it hit me that all this variety, in its continuous seasonal rotations, had been here for the past 20 years while I was away. Even though I cannot resist sometimes, I now tend to wait a bit before I rush into a purchase with no immediate purpose.

Reflection #7: If you must stash, stash wearable colors. I am a "winter" by complexion, and I love bright colors. In the fabric shop, however, I tend to neutrals, which are safe and flexible, but which don't make the most of my coloring. Neutrals will always be available, but my favorite bright royal blue may not. The current fashion season seems to be very neutral. I wish I had some stashed prints in jewel tones. Even prints with the bright fuchsia's and turquoises that I am looking for also feature beige, yellow or orange, all of which make me look awful.

Reflection #7B: Don't buy orphans. This means a great piece of fabric must sometimes acquire a companion before leaving the store....unless it already has one waiting patiently in the 3rd suitcase under the spare bed. Mostly this idea just slows down the fabric addiction chemicals in the brain to a point where logic can prevail once more.

Orphans that other people give you are ok. You can use them as an excuse to go shopping for siblings for them.


Friday, October 12, 2007

Reflections on a Sewing Plan

Today I read a post about layering on Marcy Tilton's website. Three garments were suggested whose necklines fit together so that a shirt, vest, and jacket could be worn on top of one another (and presumably removed as temperatures dictate.) I've never been much for layering other than bringing a sweater if I think it's going to be cool, such as in air conditioned restaurants when traveling in the summer heat.

It's fall here now, and raining today. We heat our house with wood, and the fire has been on all night and all day for the first time this year. It's very hot in here, and I started my day in a long-sleeved t-shirt, a treasured gift from a friend who lives far away.

As I prepared supper, and sat later in front of the stove, I realized that a long-sleeved shirt is not routine apparel for me in the winter...at least not when I am at home. Then I realized that of all the shirts I have made in the past year or so, most have been long sleeved. I've only worn them when going out, or in the case of cotton shirts, as an over-shirt for cool days or unknown weather conditions.

Reflective Lesson #1: Sew what you will wear. Since I am home much of the time, I should sew what I will wear around the house, ie: short sleeved shirts, sleeveless shirts and tank tops.

Reflective Lesson #2: Think of layering. I should choose patterns that can be worn over the shirts above, as you would wear a sweater. Long sleeves with uncomplicated necklines and coordinating colors. There's a bit of opportunity here for some neat styles, and embellishments.

Referring back to Lesson #1, I think we all spend more time sewing what we won't wear much than what we will wear often. The challenge of more complex garments I suppose is a factor. Having made the Burda Cape/jacket, and I am considering making another. Does a person need more than one of these, especially when she is also making another cape by Vogue? A cape has a life-span of what? -- 3 years maybe, before the fashion police snatch it away.

More than one person has suggested red wool crepe would make a fabulous version of the Burda Cape. My sister, who is much more practical thinks one is enough...b
ut then, she does not wear red.

As I was reflecting on all of this, I was stretching my legs and feeling glad I had on my taupe stretch cords, made for SWAP last year. Suddenly, it occurred to me that I really love these pants, and also the brown ones I bought from Northern Reflections, and will probably also love the green ones waiting for hems and a 5-lb weight loss:

Reflective Lesson #3: Sew what you will wear. I like stretch cords. Therefore, make more. I could/should make them in every pattern and color I can find. Make them in NAVY for heaven's sake. My potential SWAP has a navy base -- make it work. Good grief, if I can find the fabric, I could make them in fuchsia and see if I have the nerve to wear them. Other stretch fabrics might be just as great!

Yesterday and today I worked on 2 Jalie T-shirts, trying to get the pattern adjusted for a good fit. Knits frustrate me, and I mostly still don't get them right. On the first round, the fit was tight because the fabric did not have quite enough stretch. I knew that would be the case, but figured my daughter could wear it. It was the sleeves that surprised me....so high, and so tight,...and so uncomfortable.

Rather than give up in despair (after I had already made copious notes about what to change on the shoulders and bustline) I impulsively chopped off the sleeves very short. Well! Now the shirt fits half-decently, the shoulders are not off nearly as much as I thought, and if I make that 5-lb weight loss, my daughter will not be getting a new shirt.

I enlarged the sleeves and lowered the armholes on the pattern by using the armscye of a larger size. It was moderately successful, but the forward shoulder adjustment still results in a strangely twisted sleeve. If you are still with me, I am getting to my reflection. It happened when I came upstairs to get out of the long sleeved too-hot shirt. An old black T-shirt from Reitman's was on the bed, and I put it on. It is made with a ribbed knit, a bit stretchier than the fabrics I have been using, but it fits perfectly -- even in the shoulders -- which is saying a lot because my shoulder seams are always too far back.

Reflective Lesson #4: If you have an old perfectly fitting shirt, take a pattern off it instead of fighting with alterations on other people's patterns. Duh.

Reitman's still carries this fabric and style of shirt, but they have changed their sizing, or perhaps the stretchiness of the fabric has changed. I have several of the old version. Best get to work tracing them off.

I should never have accumulated a stash. Now it takes forever weighing options about what to do with this or that. I read a post by Kathryn showing a princess style dupioni shirt. I decided to use my green dupioni for a similar pattern......decisions: short sleeve or long? muslin first or not? Is this really what I want for this dupioni? OK. Better make a muslin since you will have to do some alterations for sure, even though this is a Simplicity B-C-D cup pattern. Around we go again. What to use for the muslin? Junk fabric, decent cotton -- what will go with the potential SWAP. This is nice, but there are 2 whole meters. Never mind, use it anyway. Do I really want a short-sleeved shirt from this beautiful Asian cotton?........around and around.

Reflective Lesson #5: Sometimes you have to just do it. I muddle too much. There are no right answers, maybe not even any best answers. Pick a fabric. Pick a pattern.

Reflective Lesson #5A: If there is something #5 will go with, made or unmade, carry on. Use crappy stuff for a minimal fitting muslin and quickly get on with the fashion fabric that you really want to work with.

So there you have it, a rainy day's ramblings, and maybe some focus to very unstructured sewing of late. I hope this helps my progress.

Tuesday, October 9, 2007

Jacket/Cape - Burda WOF - Aug 07, #111B

A late-summer sewing splurge found me enchanted with the cape/vest from the August Burda WOF. It's a very avant-garde fashion statement for me, but needed a change and a challenge.

The picture below shows the result, though I can now see it needs a good pressing!!

My original intention was to make the jacket from red wool crepe, purchased for last year's SWAP, but never used. This green one was supposed to be a wearable muslin, to check out the sizing, then it became a major project in itself.

This garment was fun to sew, but has a bazillion little details that can be a thrill or a pain. The underlying vest is very comfortable, and suggests being used as the base for a jacket, adding sleeves from another pattern.

Process: I traced and pin-fit the pattern, and decided to sew it without any alterations. Usually I would lower the bust and lengthen the torso, but the bust seemed to fit well (besides, it's essentially behind the cape, isn't it?) and I was not too sure about how to lengthen the curved pieces of the cape. In retrospect, I should have stifled my urge to get going and thought this problem through.

So off I went, working with a piece of green faux suede, also bought for my last SWAP and not used. I only had about 1.5m of this stuff, not enough to make the unlined version with wide front facings, so I made the lined option, using a length of quilting cotton I had bought for a shirt. I decided it was too heavy for a comfortable shirt, but it had the exact green in it to match the Fashion Fabric. Killing two stash pieces in one fell swoop!

The faux suede, which I had not sewn with before, was wonderful to work with, and of course, the cotton was no problem.

The Design: The pattern is essentially a princess seamed vest and the cape portion is seamed into the princess seam at the front.

No project would be complete without a litany of lessons learned and errors made:
  • Being long-waisted, I really should have lengthened the whole thing. The belt is designed to come round slightly above the waist, and for me it is several inches above, so not all that comfortable. Lengthening the cape would required some thought, as a drop of 2" would increase the circumference quite a bit. It would be necessary to decide whether to do that, or to change the curve.

  • Speaking of the belt: I made it too short (one should always actually measure the part around which the belt goes, then add for what will extend through the buckle). I also used a stiff woven interfacing in the belt. Not sure it was the best idea. I ended up having to add a piece to the center of the belt so it is not a fashion statement in any way. Fortunately it is not visible as it sits under the cape back. Nevertheless, a new belt is in order. Unfortunately, I do not have any fabric left. Every scrap was used.

  • There is a lot of topstitching, and for the bit around the hem (the lining is seamed at the edge of the hemline) it might have been wise to baste rather than pin, or use a fusible tape to keep one layer from creeping more than the other around the curve. Since all the topstitching is not done at the same time, keeping track of stitch lengths and width from edge, and thread color is important.

  • Working carefully: At the front where the cape joins the front pieces there is a very short of seaming below the slit for the belt. So there is absolutely no room for error in the hem or the placement of the belt slit. Personally, I would have left a bit more there for safety's sake. I had to pick out some stitching there and raise the belt slit a bit to make everything come out neatly. The belt slit starts exactly at the topstitching line around the hem edge. I am not sure what happens here if in the unlined version where the hem is turned up, but you have to leave room for it.

  • There are a number of places in this construction where the mind has to conceive things inside out, upside down and backwards. My mind does not do this well. In particular, getting the lining installed was laughable as I struggled to figure out where to sew, what sides together, etc. I believe this is called "bagging" a lining, where the lining is constructed separately from the garment then all sewed in together, turned inside out by hauling through a shoulder seam or someplace equally narrow and inaccessible. There was a lot of scrunching up during this process, but it came out well in the end.

    One thing I did right was to leave the final lining seam open until I was sure everything else was properly placed and I did not have to get back inside for anything. (In fact, the final side seam is still open, as I forgot to sew it up when doing the final touches today.)

  • Interfacing: Without pretesting on a scrap, I interfaced the collar, epaulets and pocket welts with a lightweight woven fusible. The result was pieces that resembled cardboard in their flexibility. (This was part but by no means the most critical factor in ruining the collar.) I was able to redo the shoulder decorations with a thin knit interfacing that left some movement. Otherwise they would not have bent enough to sew them down. I used the welts as they were since they did not require any movement once in place. (You must remember here that I was seriously out of fabric at this point.)

  • I ruined the collar at the beginning. No need to go into details, just not paying attention and also using a too-stiff interfacing. I did not have enough fabric to make another, so my collar now matches the lining. This is not a particularly bad thing, just annoying.

  • The neckline where the collar attaches is bulky. Both vest and cape join at the collar, so there is a lot of bulk there to deal with. This is in part due to the bulk of the chosen fabrics and collar interfacing. In another incarnation, I would be more careful about clipping and really ponder over the construction methods and fabric choices to try to reduce this.

  • Lining with cotton: I chose the cotton lining for its color match to the suede. It is a bit heavy and un-slippery for a lining. I made this choice when I was still viewing this an an experimental garment. For best effect, I think this jacket should be made with collar and lapels made of the main fashion fabric. On the other hand, the cotton adds warmth, and it certainly adds an interesting element to the design.

  • I messed up the buttonholes: Buttonholes are not my strong suit. This front has 6 large buttons in a double-breasted style. There are some other little details around the button layout, but I was again not as careful as necessary and misplaced the center buttonhole by 1/4", leaving insufficient space for equally spaced buttons at the top. Though I do not expect to wear this garment with the top closed up to the neck, it would have been nice to have done it right. I need to get over my fear of getting the buttonholes looking good and properly placed. Practice. Practice. Practice.

Monday, October 8, 2007

Donna Karan Cape - Day 3

The back of the cape is completed:

This morning I worked on the back of the cape, as it is the only bit that can be done without making a decision about the armhole openings in the front. I think I'm doing a bit of overkill on this project, considering it was an impulsive pattern purchase. Apart from the color, the fabric is only so-so. Fabricville $24.99/m on sale for half price last week.


I pressed the darts, basted the organza in place, and after much-much-much experimenting with needle size, tension and presser foot pressure, finally got my machine to stitch reasonably well through the 2 thick interlined pieces of fabric. I'm still not happy with how my machine is sewing, even after a tune-up last week. It is possible, I suppose that it is my problem and not a technical one. There's a lot I don't know about both organza and sewing heavy fabric.

Photo shows the back seam edges, ready to be joined. That seam is now sewn, pressed and awaits a binding of some sort. I did not topstitch, as I need to be sure it will look right, and will have to experiment further, perhaps with some heavier thread.

Part of the Grosgrain decision is made:
I received a helpful email from Susan in my sewing group, enlightening me about the difference between grosgrain and Petersham.

"There are 2 types of Grosgrain ribbon. The one that you can buy in Saint John has a straight edge and I expect that the one you need has the little picots and will shape around curves (also called Petersham). "

Of course, Petersham is what I need, and of course, it is not available locally. Nonetheless I have decided to trust the designer's design, and use this trim down the front edges, collar and pocket flaps. (The pattern instructions refer to it as "grosgrain." I am so pleased to know there is more than one version of this.) I had seen grosgrain in a multitude of colors at The Sewing Place website, and sure enough, it specifically explains that it is Petersham. Hopefully the color I ordered will work. Waiting for this to arrive will give me a good reason not to become obsessed about getting this garment finished, and to tackle a couple of other in-progress items.

Armholes still on hold:
Having decided on the grosgrain trim, and on not having raw edges anywhere, still leaves the arm openings undecided. I quote the dilemma from an (edited) post I made to the Stitcher's forum a few days ago.

"The part that confuses me is the arm openings in the front.

Grosgrain ribbon is stitched along left and right sides of the slash line on the right side of the front fashion fabric. (edges of ribbon line up with slash line). The FF is then
slashed.

A separate elongated oval piece of FF, called the "applique" piece is laid on top and a narrow rectangle
is stitched along the edges of the slit and across the 2 ends through the ribbon and the front. The applique piece is then slashed down the middle of this narrow rectangle. The (raw) outer edges of the oval are then stitched down. There are no instructions to finish the slash edges in any way.

So we have, from the underneath up: front FF, slashed with raw edge; grosgrain on top of each side of slash; applique FF on top with raw edges slashed and unfinished outside edges of the oval stitched down.

In the pattern photo the grosgrain is clearly visible in the arm opening. I am at a loss to fathom how it becomes visible from underneath the applique piece.
There is a traditionally constructed welt pocket elsewhere on the cape. I wondered why the arm openings were not similarly designed....but then, I'm not the famous designer, am I. It seems to me if the applique were turned to the wrong side before stitching it down, the opening would be finished (similar to the welt for the
pocket and the grosgrain would be visible. This is what the photo looks like, but the technical drawings show the applique on the right side.

I usually get into trouble when I try to change pattern instructions that I think are inadequate, so I am trying to be more careful to do as I am told in the hopes of getting a better and/or easier result."

I already tried a sample flipping the applique piece to the back, as in a welt, but my FF is too heavy for that.. It would work, I think, using a lighter weight fabric for the welt. Something will pop up in my mind, or someone else's sooner or later.

Next steps will be to
  • baste the organza on the other cape pieces,
  • look for a suitable lining fabric. The pattern is not lined, so there may be some creative design required around the facing to make the lining fit correctly and still allow access to the arm opening.

  • find a fabric of a lighter weight but the same color (good luck to me) for the front facings. I think my fabric is too heavy for a facing, creating too much bulk at the collar and at the hem.
I think one of my lessons from this garment is to only use the recommended fabrics.....then you can actually follow the directions as given. Ah well, what fun would there be in that?

Sunday, October 7, 2007

Donna Karan Cape -- Day 2

Thanks to my daughter-in-law (who is preparing our Thanksgiving Dinner) I have been able to spend much of this day sewing. The cape is cut out and well meditated over. The pattern called for 2 meters, but I have enough leftover for a slightly A-line, knee-length skirt if I piece the belt for the cape. How great is that!

I tried some very soft knit fusible interfacing on a sample, and vetoed that idea. Even though it was very light, it made the wool much too stiff. Also, the fusing process is just too iffy...potential for bubbles, twists, and a flattening of the nap on the 'right' side due to too much steam and heat.

Instead, I decided to interline with silk organza. At this point the organza is cut and pinned onto the cape pieces. Now I have never done this before, and I don't even know if it is an appropriate use of silk organza, but on the back cape piece it seems to add a bit of body to the garment without changing the nature of the face of the fabric. I think it will also add a layer of warmth. It's not pretty, so I'm still looking for a suitable lining.

Dinner is being served at my dining room table, so I had to finally stop the sewing and clear things away for what promises to be a magnificent supper.

I have not solved the issue of the arm hole slits and their "applique" piece. I did a quick sample done as a bound buttonhole, and my fabric is too thick to do that well. The binding would have to be something less weighty.

I am pondering using a fabric that will allow raw edges. Perhaps ultra-suede, though I've never even seen it. I have also not resolved the grosgrain edge and button hole trim. I have none to play with, so that will be for another day.

Tomorrow I will hand baste the organza onto the back pieces, decide on an inside seam finish (maybe none since it will be lined) and sew up the back seam, topstitching on both sides of the seam line. I tested that and it looks great. I will also eventually do the shoulder/side seams the same way.

This is a thick fabric, so I am a bit worried about bulk at the collar/neckline...but that will come in its own due time.

Happy Thanksgiving fellow Canadians.

Saturday, October 6, 2007

Donna Karan Cape Vogue 2924 - Beginning

Tonight I checked out the pattern and laid it on the fabric.

The fuchsia wool is a blend, including some acrylic and something else which I temporarily forget. I pre-treated it with Eucalan, which softened it quite a bit. It drapes nicely, but seems to have the potential to stretch out of shape. for this reason, I think I will interface all the pieces with a soft knit interfacing, and line the cape with silk. This will make a totally luxurious cape, which should hold its shape well. Silk should add some warmth, and it will be wonderful to slip on. So I'll have to find some silk somewhere, hopefully in a navy/fuchsia print.

I now have to make some other decisions to make:
  • Exposed Raw Edges: The pattern is intended to be made with melton, which I presume can handle raw edges. The instructions are a strange blend of seam edges finished with bias tape and raw edges top-stitched down on the outside. These raw edges include the shoulder/side seams and the collar/neck seam. This does not appeal to me, so I will sew the seams in a conventional manner, possibly top-stitching on the outside.
  • Similarly, the armhole slits are unfinished, and an "applique" piece surrounding the slit is topstitched onto the right side, with exposed raw edges. This seems totally tacky to me, and I think the slit should be created similarly to a bound buttonhole.

  • Grosgrain trim: The front edges, collar edges , armhole slit and pocket flap are trimmed with grosgrain ribbon, which is applied in an interesting fashion which needs some practice pieces before a final decision about whether to apply it or not. Doing so depends on acquiring grosgrain in a suitable color. It would have to be either fuchsia or navy. Not sure I can find it locally, so I will have to check out sources for 5/8" grosgrain.
  • I've never used grosgrain, so I'm not sure if it will look cheap. My reading of the instruction pictures the grosgrain sandwiched between the front and the facing, and extending out about 1.4". The grosgrain is attached to both the outer and under collar, so there are 2 bits extending at the top edge of the collar. I am not sure why this should be the case, but it is. It would be interesting to follow the directions and see the outcome. Unfortunately, there is no changing the mind after the fact without a lot of ripping out. The options would be no edge treatment, a bias binding using the lining fabric or a sturdy plain fabric, or stitching on a piping. Piping would require a hem facing I think.

  • The buttonholes of this pattern are also trimmed with grosgrain, then a raw-edged rectangle of Fashion fabric is stitched on either side of each buttonhole. I rather like the effect, but I'm not sure about the sewn-on bits of fabric, and I'm not sure that without them the grosgrain will look classy enough for the design of this cape. Leather would look terrific, but I've never used leather, and would likely ruin the whole thing. So perhaps no special buttonhole trim would be in order. Maybe make bound buttonholes and select some special buttons.


  • The bottom edge: The bottom edge of the cape is also unfinished...just cut with pinking shears. I have to say, this was the first thing I noticed when I read the pattern directions, and I was disappointed as I thought a Donna Karan design would have some classy finishing. At the very least, I expected that the pattern would offer options for fabrics that would not take well to a pinked edge. I have decided to add 5/8" to the bottom edge, and to do a HongKong finish on the hem.
So that's it for now. Tomorrow I will cut the pieces and interface.

SWAP 2008 - To Sew or Not to Sew, that is the Question

I see the excitement building on the Stitcher's Forum around the latest version of Timmel's SWAP contest. SWAP was a great learning experience for me last year, but toward the end, I was not very happy with myself working under the stress of a time limit. At that time, I vowed not to participate next time......then I began reading posts, and, well.........

I'm still undecided, but I have, as is outlined in my previous post, been working toward coordinated clothing items. I have almost enough for a SWAP in my NAVY category, and one garment is already made, and one is almost finished. The disadvantage is that I have my "print" as a bottom. The navy with small silver stripes looks great as a skirt and pants, but may not take well to a print top, leaving me in a more difficult planning position than if I had chosen a print top.

Somewhere I read that to look stunning, dress in all one color, including hose, shoes and purse, and wear a jacket of another color. Sounds good to me, so I'm going with that theme as I move into this navy/grey wardrobe. At this point it does not fulfill SWAP criteria particularly, but if I can get these bits working, I'll have enough to make a SWAP out if the result.

My "stunning" jacket will be a fuchsia wool cape, (Donna Karan - Vogue 2924) designed for outdoor wear, so there will also be a scarf of a similar color, or another light-weight jacket to set off the outfits when worn indoors.

This pattern will be a challenge as there are some very unusual directions, such as raw edges where the collar joins the neck edge, which I will have to work through to my satisfaction. I hope to document the garment as I cannot find it reviewed anywhere.


The navy and blue-grey show up decently here, but the white in the background is actually more grey than it looks, and the blue on the right goes better than it looks with the navy. In between the 2 silver stripes, there is a line of a lighter blue. The fuchsia would not photograph well, but you get the idea perhaps.

So my 2 monochrome outfits to contrast with the fuchsia cape are:

Navy/silver stripe pants and skirt; navy light-weight knit short sleeve top or tank style; navy cuddly knit long sleeve top. This skirt is already made.
Heathery blue-grey knit pants and skirt; same fabric top so it looks like a dress when worn together. The skirt is underway, the top is cut out, but I think it is too small a size, so I will make it up for my daughter, and try again.

These 3 tops, along with a light grey sparkle knit all go with both sets of bottoms.

I also plan a white fitted shirt (first try at a Simplicity 3684 B-C-D pattern) to wear with the navy bottoms, and a chiffon shirt in a grey/white/blue print to wear with the blue-grey bottoms.

None of this includes a purchase from Julie, and I am thinking of the blue wool denim as a possible 'indoor' jacket to pair with both, but I have lost my swatch, and need to track it down before making that decision.

Last time I spent far too much time with planning and re-planning the fabrics and colors. This time, should I decide to take up the challenge, I will stick with my first instincts as much as possible and get on with it.

One lesson I learned, however, is that the styles and fabrics have to work together in all combinatons, so there can't easily be a combo of dressy and sporty. I think I am working toward a mid-range -- clothing for shopping, travelling and visiting. Using the same fabric for pants and skirt introduces a bit of boredom, but also some versatility to dress up a bit when required.