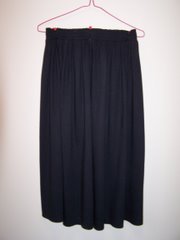
Since I had just finished my OneSeam Pants, I decided to use the principles of the waistband there, to apply to my skirt. However, in the interests of keeping the waistband as un-bulky as possible, I decided to make it separate, and just long enough to fit over my hips.
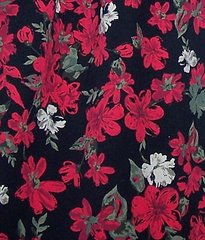
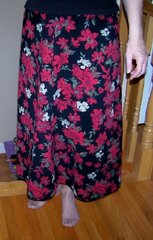
The whole thing went together quite simply, considering I had no pattern, and really little idea how full the skirt should be. I don't generally like gathers at the waist, but this is so soft, I figured it would be ok. I decided to use the full 60" width, thus avoiding side seams.
There was only one major hassle, from which I easily recovered. I am sure there is a better way, but I'm happy with the result.
How'd I do that?:
- Cut the band 4" wide and just long enough to slide over the hips when stretched
- Measure 1.25 inch sports elastic to be snug at the waist, about 5-6" shorter than the waist measurement
- Seam the short edges of the band, leaving an opening for the elastic.
- Fold the band in half and serge the long edges of the band together
- Topstitch at the fold, one presser foot width - be sure you have enough band remaining to hold the elastic.
- Quarter the band and mark with pins, then divide each quarter in half, and each of these halves in half again. You will have 16 sections of band about 2.5 inches wide, depending on the original band length.
- Decide on the length of the skirt and cut off the appropriate piece of fabric. Leave a generous hem. [I'm not done hemming yet, so this idea may change once I see the effect of a wide hem, but my instinct says that the lightweight jersey will need some body in the hem to keep it from rolling, and to make it drape well.]
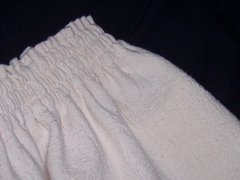
- Quarter the top of the skirt, then divide into 16ths as for the band. You can eyeball the divisions once you get the eighths marked, as there will be more gathering once the elastic is installed.
- Match the pins, and fold the extra fabric into a box pleat in the middle of each section of the band. [I am sure it would be simpler to run a gathering thread around the top of the skirt, and pull it in to fit, much as you would do to set in a sleeve, but the pleats were my experiment of the day.]
- Once all the pleats are pinned in place, BASTE, remove the pins and serge the band onto the skirt top with a 4-stitch overlock, keeping the folds in the skirt perpendicular to the line of stitching.
- Feed the elastic into the band. Try on the skirt, and shorten the elastic if necessary.
- Butt the ends of the elastic with zig-sag stitches onto a light piece of fabric (per Louise Cutting's directions, which works beautifully)
- Close the opening with slipstitches.
- Evenly spread the gathers around the band, and put pins vertically at each quarter.
- Topstitch 3 rows approx 1/4 inch apart through the elastic, keeping it stretched smooth by pulling in front and behind as you stitch (also per Louise Cutting).
- This is where I ran into a bit of a problem: There was a bit of space, rather uneven ugly space between the bottom row of topstitching, and the actual serged seam holding the bottom of the skirt to the band. This was the result of having seamed the waistband to the skirt. This did not pass muster at all.
- My solution was to fold back the band, and re-stitch the skirt and band together inside the serged seam, along the bottom topstitching line. I stretched each quarter of the band flat, and sewed with the band on top follow the top-stitching. This strengthened the waist seam, and made all the lumpy unevenness disappear.
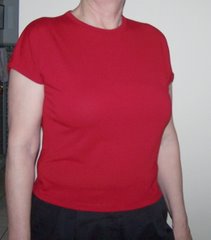
- A nice fit at the waist, comfortable, soft and light for travelling.
If anyone has a way to do this better, I'm happy to hear it. I think with this fabric, it would have been fine to proceed totally as for the OneSeam Pants, as there is not a lot of bulk, however, some fabrics would be better with a less bulky waistband, and this is what I decided to experiment with.




No comments:
Post a Comment