- Added 1.5" to lower the bust
- Added 1/2 inch to the fronts at the SA to accomodate full bust, and to the sleeve front so it will fit.
- Determined that the sleeve requires a very fine elastic, narrower than 1cm.
- Otherwise, the fit looks good.
- There were also a few construction details that I was able to iron out, especially around the fitting together of the collar.
- Not using an elastic at the sleeve, but simply widening it a bit at the bottom, and hemming. This looks much better than the gathered sleeve, at least in cotton
- Adjusting 1/2" on the back shoulder seam at the outside edge, for a forward shoulder. This seems to be something I will have to do regularly.
- Adding 2" to the length so the bottom of the shirt will fall at the first 1/5 point on the hip.
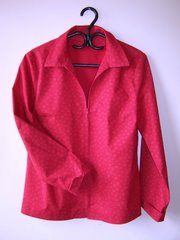
This is a fussy shirt. There are 3 tucks at each shoulder in the front, and the sleeve caps are quie full. It is intended to be made in a soft fabric, and this Swiss Dot cotton seems fine. It is a but fussy to work with however. The tucks went in smoothly, and I first sewed the shoulder seams making no adjustment to the front, just addint 1/2" to the back seam, tapered to nothing at the collar edge. The fit looked good, but arranging the sleeve became quite a problem -- probably one I should have solved before cutting them out. Essentially, I had added 1/2" to the back and made no change to the front. Where does this put the sleeve cap?? My original thought had been that the 1/2" would eat up some of the extra fullnes, but then there is the matter of keeping the grain straight. I had read a tip somewhere to baste a line parallel to the grain across the sleeve cap. This must be level if the sleeve is to fall correctly. The sleeve looked ok, but the line was not quite level.
This is where I decided to sew up the side seams and forget trying to get the sleeves in flat. When I did this, I found there were funny bumps around the shoulder area, so I undid the seams and took almost 1/2" off the front seam at the shoulder edge, tapering back about 2". This seemed to take care of the bump in the front, and should also eliminate some of the sleeve fitting questions. Not there yet.
I am planning to finish the seams of this blouse on my serger, but since I may have to take out the shoulder seams again, I did a self-fabric HongKong finish on them. I think it's a bit bulky, and may show through the shirt. But I would have to serge before putting on the collar, then if I have to take the seam out, there will not be enough of it left. The side seams and sleeve seams, I will eventually serge.
I made up the collar, remembering from before that the dots on the stand and collar are essential and have to be placed exactly to get the collar to fit onto the band. I am still not sure whether the seamline should be extended beyond the dots, or should stop there. Of ocurse, my machine decided to act up during the topstitching. An annoyance, but I dont think it shows too much -- it's where the band and collar join.
I also tried some circles of stitching at the center back of the under collar to see how it works to keep the collar up. I am not even sure this style will look good with the collar standing up in the back, but I wanted to try the technique, and it can always be folded over anyway.
I ran into some interfacing problems. I pre-shrunk the I/F but I don't think it was shrunk enough..I am a bit worried how this will come out in the wash, but I did not have any fabric leftover to re-cut, so I will just have to give it careful laundering and hope for the best.
I left the project after getting the collar ready to stitch on. I don't like to sew collars at night after several hours of work.
Next time, I'll get the collar done, and hopefully the sleeves. Then there will just be buttons and hem. I'm not sure yet what I will use for buttons, something small and dressy, or self-covered ones.



No comments:
Post a Comment