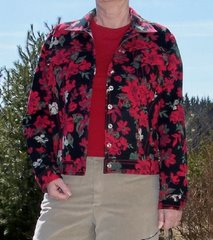
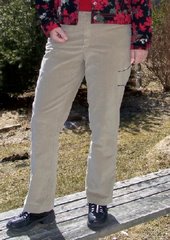
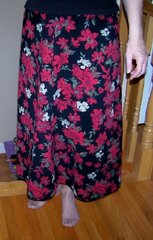
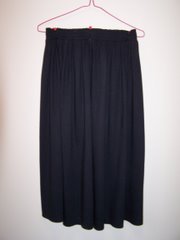
The SWAP is coming to an end. So is my sanity.
Nothing is going very well. Mistakes everywhere. Someone on the board mentioned not being in the Zone, and I think that is what's happened. All my hobbies are done when I "feel like it." Otherwise, the quality suffers. In an effort to finish this project, I've been working when I should not be, and mistakes and errors of judgement abound.
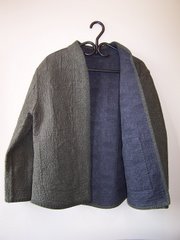
However -- the Stippled Jacket is done, except for buttons, and I'm not sure I even want buttons on it. I know about all its shortcomings, but it seems to be getting lots of compliments, so they must not be too noticeable. There are a few things I would do differently next time....I think they are noted, or will be, on the Instructions Page which I was bold enough to write with ZERO experience beforehand.
The bamboo cowl neck top has turned into a wadder. The neckline seam doesn't want to go together correctly, I've misplaced the sleeves, and I generally got sick of it.
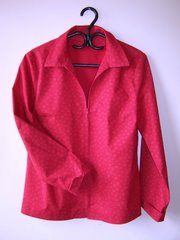
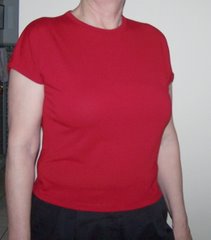
Arrival: Burda WOF for March!! I chose a pattern for a tunic style top. (#103) (without the decorative buttons)
I should note that the pattern pieces for this shirt are very oddly shaped, and should be carefully marked as to where the top of each piece is. I spent awhile looking at my unlabelled front pieces trying to figure which of the 4 sides was the shoulder seam. (Tip: a friend last evening, at our Sewing Group meeting suggested that when tracing a pattern, you should only put the upward facing arrow on the grain line. That way, you always know if your pattern pieces are headed the right way.)
By happy chance, this shirt is Burda's Sewing Lesson of the Month, so there are detailed instructions. This is a cool shirt. Not being in the Zone however, I messed it up miserably by making my muslin from a lovely soft viscose fabric that slips a bit when being cut, and a lot when being sewed. It drapes beautifully, and anyone in the Zone would have used fusible interfacing on the bands, especially with soft flowy fabric. Not me. I chose this moment to experiment for the first time with slippy soft flowy silk organza. DUH. Long story short: There are a few wrinkles where they aren't supposed to be, a few seams not quite straight. But not so terrible as not to be wearable. (I am a poet in another life).
The worst part of the tunic experience is that I decided to actually follow the given directions. Not something I necessarily do, but something I have learned in this SWAP is that I can get into trouble inventing my own rules. BUT...in this case, the Burda instructions leave raw edges of seams at the neckline (where there is a zipper), and at the bottoms of the sleeves -- where I know they are essentially invisible, but still.......As well, the interfacing is exposed on the inside of the garment. Never saw that before either.
After realizing that I should have followed my instinct about the bands and sewed them on so as to hide the seams, I decided to try to do that after the fact, ripping out a bit of seam/topstitching and trying to undo and redo stitching, all to no avail and resulting in loads of frayed ends and frustrations. After all that, the sleeves seem to pull awkwardly and hang crooked.
As we speak, I have decided to forgo the bands on the sleeves, totally remove them and hem the openings. This presents its own set of fitting issues because of the kimono type styling to the sleeve/side seams.
On another point, this pattern calls for a 24" invisible zipper in the back. I could only find a 22" one, and even though I added an inch to the length of the garment, the zipper is still extra long.
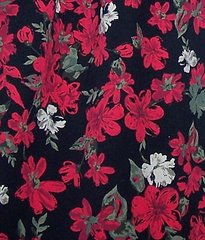
Though I don't like its directions, most of my troubles are self-induced on this pattern, which of course is another way of describing a learning experience. It has intriguing construction and fashionable syle, and I will make another one of these someday, but probably not for the SWAP. My nice red cotton which was to have been my post-muslin shirt will be made into something without so much oddness. Meanwhile, off to supper, and then another attempt to get this one finished.
Later: I got the sleeves organized in an acceptable manner; I'm leaving the zipper until morning. I have to figure out how to finish the seams, as they want to fray all over the place. I probably should have serged as I went along. (Note to self about next time!).
I think there's hope for this shirt, assuming the zipper goes ok, but it won't be a masterpiece.
Showing posts with label stippled jacket. Show all posts
Showing posts with label stippled jacket. Show all posts
Wednesday, March 21, 2007

Sunday, March 11, 2007
Stippled Jacket Instructions

Pictures here - more to come. This picture shows the shoulder seam. To the right is the collar, edges unfinished.
I found a dearth of Stippled Jacket instructions on the web, so I wrote my own. If you want to go directly to the instructions, such as they are, please scroll down.
Stippled Jacket: How'd I do that?? (edited March 13 re binding instructions; edited March 15 re bindings; Edited March 25 to tidy things up)
These instructions were written as I worked my way through a 3-class course on making a quilted reversible jacket. I did not have written instructions until the 3rd class, and did not find any online. Thus I have written what is here to be helpful but NOT AUTHORITATIVE. Remember, it is based on my vast experience of my ONE and only jacket:
- Pick a pattern that is easy. Make sure it fits. My pattern was Rochelle's Reversible, by Saf-T-Pockets. (This pattern is available from Timmel's )
- Choose colors for back, front, collar or other decorative accents, and binding of jacket edges. You need enough fabric for both sides. Good fabric makes this a very expensive jacket.
- Calculate enough fabric for each side of the jacket to cut all pattern pieces (no facings required) with 2" of empty space all around. You will need the same amount (as one jacket side) of plain ordinary flannellette (or other batting of your choice).
- Add enough extra fashion fabric for bindings. You need to bind all seams on ONE side of the jacket. (Decide which side will have 'normal' looking seams, and which side will have the seams covered with a 1/2" of self-fabric.) I am sorry I don't have much feel for how much binding you get from any amount of fabric. You will need bias for the armscye for sure, and whatever other seams have any shape to them.
- Note the width of the seam allowances on your jacket pattern. If you have 5/8" seam allowances, you will need binding that is 2.25" wide for the seams that cover the raw edges (#5). If your seam allowances are 1/4" your binding will be 1.5" wide. (In our group, the rest of the people are quilters, who are used to 1/4" seams. I left mine at 5/8 and cut them down after the fact.) Save all this info for later.
- Also note, that you also need bias binding for all around the edges of the jacket which may match or coordinate with your other colors. I was advised that 1/2 meter would give me enough bias for this, and it turned out that I had plenty leftover. The width of that binding depends on whether you want it single thickness or folded.
Experiment until you find the width you want before cutting your strips. My binding is 2.75". I am using a folded binding, which I am stitching a bit over 3/8" from the edge, using my presser foot as a stitching guide. The edges of my binding are set back 1/4" from the garment edges. This reduces the bulk in the binding, and allows sufficient fabric to fold over the edge and have approx. 1/2" on the other side. The binding which you turn to the other side must be wide enough to cover the stitching line. I am hemming it down by hand. Important edit March 15: In hindsight, I would not try to stitch the binding offset from the jacket edge. I would make my binding 1/4 - 1/2" wider, stitch it aligned to the edge, and trim after the fact if I thought there was too much bulk. It was altogether too difficult to keep the edges the correct distance, and to be sure that the underside of the binding was caught in the stitching line. As previously suggested: Experiment. - Wash the flannelette. Iron the fashion fabric. DO NOT WASH the fashion fabric. Flannelette shrinks a lot, so it's best (so I'm told) to wash it once first. The fashion fabric (usually cotton of some sort) will shrink a bit and cause the jacket to become puffy after stippling.
- Make a fabric sandwich of the 2 sides (right sides facing out) with flannelette between. You can cut each piece separately, and make the sandwich later, or you can stack the 3 pieces and cut all together.
- Cut each pattern piece so there is at least 2" of space all around. Watch grain lines as you would laying out any pattern. Mark the grain lines and other significant info on the piece of fabric, remembering that you will be recutting after stippling and washing the pieces. Its helpful to know at that point where the grain line is, and the center of the sleeve, center front etc.
- Stabilize the sandwich so it won't move as you stipple. I sprayed very lightly with 505 between the flannel and the fashion fabrics, but pins will work. Don't worry about small wrinkles.
- Practice your pattern. Using sandwiched scraps, practice stippling in any design, or combined with channel stitching. In my reading, it is recommended to stipple a bit on a scrap each time you go back to your jacket work, just to get into the 'flow' of it. Suit yourself.
- Stipple all your pattern pieces, extending into the 2" of extra fabric. (Note: my stippling pattern involved alternating 1/2" wide and 2" wide vertical channels, with free-motion stippling in the 2"wide sections. In retrospect, I would make the narrow channels about 1/8" wider so they would be a little more emphasized after shrinking.)
- Throw everything into the washer and dryer, including any SCRAPS which will be used for BINDING, or fabric specifically purchased for binding. Your jacket pieces will be lovely when they come out of the dryer.
- Lay out your pattern pieces on the stippled work, and cut. Pay attention to previous markings and grain lines.
- Cut seam bindings (2.25 or 1.5" -- see #4) sufficient for side, sleeve, armscye, collar and shoulder seams for one side of the jacket. Bias is preferable but not always necessary.
- Cut bias bindings 3.00" - 3.25" (for approx 1/2" binding from folded bias) sufficient for the front edges, bottom edge and collar edges from your chosen fabric. (Note: I am no binding expert...consult with a quilter to get the bindings right.)
- Fold the bindings in half lengthwise, right sides facing out and press.
INSTRUCTIONS FOR ALL SEAMS: HOW TO BIND THE SEAMS: The seam bindings are stitched when the seam is sewn, with the raw edges lined up with the edges of the seam. The seam allowance is then graded and bulk reduced. The seam is pressed to one side, and the binding laid over the raw edges and hemmed or topstitched down.
DETAILS: - Determine which side to put the binding on when sewing the seam. )Think about how the binding will face when folded over the raw edges):
- Shoulders, side seams and sleeves --binding on the front, press seam to back
- Armscye, binding on the body, press seam to sleeve. (Edited note: My jacket has slightly dropped sleeves. Turning the binding toward the sleeve, though it makes it easier to deal with the fullness of the sleeve, tends to make the sleeve look more dropped than it should. If I were to make this jacket again, I would sew the binding onto the sleeve edge and turn it toward the jacket side. -- just a personal observation, and perhaps not at all helpful)
- Collar - binding on the body, press seam toward collar - not sure about this, as I did my collar differently.
- Reduce the bulkiness of the seam by trimming the seam allowance to 1/4", then further trimming one of the allowances on an angle to grade. (On the armscye, be sure the sleeve allowance is the one you grade, as it is bulkier than the armhole edge.)
- Press the seam to one side using a damp cloth. Press hard on both sides of the jacket. I pressed both before and after trimming away the bulk.
- Pull the binding over the raw edges, press and baste into place. The binding should be about 1/2" wide. If you are going to topstitch, baste I closer to the seam than where you will be stitching so that your basting does not get caught up in the topstitching. It's easy to baste right at the ironing board while the seam is damp and warm, then everything stays put while you try on. I found pinning in this thickness of fabric to be less than joyful -- also occasionally painful.
YOU'LL USE THESE DIRECTIONS AS YOU PROCEED WITH SEWING YOUR JACKET BELOW - FINALLY YOU CAN START SEWING YOUR JACKET!! Pick a side to be the "right" side. The other side will have the seams showing, which will be bound as above. Use a stitch length of 3 or 3.5. At each step, bind as above.
- Stitch SHOULDER seams, right sides together, with the BINDING on the FRONT.
- Fit the SLEEVE and sew with the BINDING on the BODY before stitching up the side seams. Finish as above noting removal of bulk on the sleeve side.
- My sleeve was set in and slightly dropped. In this bulky fabric I am not thrilled with it. Next time I would either go with a raglan type sleeve, or I would have a sleeve that rested on the shoulder as in a suit jacket -- this would mean fighting with ease in the sleeve cap, but I think it would look better than the dropped shoulder in the bulky fabric.
- Sew on the COLLAR with the BINDING on the BODY.
- I made my collar (a stand-up one) in two pieces, and sewed it on conventionally so the neck edge seam was not bound. The instructor thought it might be bulkier than using the binding method above. But it worked well for me with careful trimming. It probably depends on the pattern. If I were to do this again with this pattern I probably would not use any flannel in the collar pieces.
- Sew the SIDE and SLEEVE seams. The bulk at the underarm will be problematic. It takes a lot of trimming and pressing to make it work. Use bias if you can to bind the seam. If not, be sure there is a little extra working length in the binding at the underarm to help it go on easily.
- Technically, I think the binding on the back of armscye seam should stop 1/8" before the side seam. Thus it would NOT be sewn into the side seam when it is stitched. The side seam's binding would then cover the raw edge, substantially reducing the bulk at this spot. Insight too late, but maybe next time.
- Decide what you are doing about CLOSURES before finishing the front edge bindings below. You may have to stitch something into the same seam as the binding.
- Sew the EDGE BINDINGS around the edges of the jacket, sleeves and collar, lining up the folded edges of the binding with the edge of the jacket. Press and fold over to the other side. Stitch in the ditch or hand stitch in place.
ENJOY YOUR NEW JACKET!!
Tuesday, March 6, 2007
Back in the Saddle
Today was a rather lazy day, no committments until later tonight, and Tuesday is my usual sewing-for-sure day, so I tackled the taupe pants, which are not finished except for waist fastener and hems. I think I'll wash them once again before hemming.
Taupe Stretch Cords
These are the pants that gave me much grief awhile back, and even today they made sure I was paying attention at all times. A back seam adjustment had to be transferred to the waistband; the sewing machine had to be stroked nicely a few times; and the pocket fitting will be forever elusive; but for the most part the final bits of getting the waistband attached and fitted went quite easily. Stretch cord is an odd fabric to work with. I haven't decided if I like it or not.
I probably should have interfaced the waistband as it seems quite stretchy, but then I thought maybe it was supposed to be stretchy being cut on the crosswise and all. If I used this pattern again, I would figure out a way to put some elastic in the waistband.
There's also a fitting issue related to sway back, fitted waist-band and/or low rise or perhaps all of the above. The back yoke of these pants is a nice feature but does no favors for my butt, so I will likely not choose this pattern again. Apart from that, these pants ended up being very comfortable in spite of a few flaws here and there. The Joy of Stretch! Hopefully with wear the fabric will soften even more.
Stippled Jacket (previous reference)
Class #2 for this jacket was cancelled due to a storm. I may have to figure it out for myself if I am to get it done before the SWAP deadline. Meanwhile, of course I must fix the front where the hole is. I spend quite a bit of my sewing break figuring out how to make a pocket to cover the worn area. It turned out to be a major design issue:
So the day was a good one as sewing days go. A bit closer to being done. A bit more hopeful and confident. Still to go: finish the bamboo shirt if it is not a lost cause, snaps on the jean jacket, hem on the bamboo skirt, hems and hooks on the taupe pants, cut out and finish the stippled jacket, one shirt not yet conceived. Sound like a lot, but not impossible in the 3-4 weeks remaining....especially given that we will not be travelling in April, which I think was making me stressed about the sewing.
Taupe Stretch Cords
These are the pants that gave me much grief awhile back, and even today they made sure I was paying attention at all times. A back seam adjustment had to be transferred to the waistband; the sewing machine had to be stroked nicely a few times; and the pocket fitting will be forever elusive; but for the most part the final bits of getting the waistband attached and fitted went quite easily. Stretch cord is an odd fabric to work with. I haven't decided if I like it or not.
I probably should have interfaced the waistband as it seems quite stretchy, but then I thought maybe it was supposed to be stretchy being cut on the crosswise and all. If I used this pattern again, I would figure out a way to put some elastic in the waistband.
There's also a fitting issue related to sway back, fitted waist-band and/or low rise or perhaps all of the above. The back yoke of these pants is a nice feature but does no favors for my butt, so I will likely not choose this pattern again. Apart from that, these pants ended up being very comfortable in spite of a few flaws here and there. The Joy of Stretch! Hopefully with wear the fabric will soften even more.
Stippled Jacket (previous reference)
Class #2 for this jacket was cancelled due to a storm. I may have to figure it out for myself if I am to get it done before the SWAP deadline. Meanwhile, of course I must fix the front where the hole is. I spend quite a bit of my sewing break figuring out how to make a pocket to cover the worn area. It turned out to be a major design issue:
- I stippled a square of fabric to match the design on the jacket front.
- I drew a pattern for a suitably sized pocket that would both cover the worn area and look like it was supposed to be there.
- I figured out how to attach a patch to the front of the jacket which would be covered by the pocket, and not be noticeable from the inside of the pocket. (who would be inside my pocket I don't know, but it seemed the right thing to do.
- Then I had to figure out how the outside pocket piece was to be attached to the jacket without looking clumpy which included binding the pocket opening and turning under the edges so they could be hemmed down to the existing stipple lines on the jacket front.
- I sewed the patch to the pocket at the bottom edge, so it would be finished with as little bulk as possible.
So the day was a good one as sewing days go. A bit closer to being done. A bit more hopeful and confident. Still to go: finish the bamboo shirt if it is not a lost cause, snaps on the jean jacket, hem on the bamboo skirt, hems and hooks on the taupe pants, cut out and finish the stippled jacket, one shirt not yet conceived. Sound like a lot, but not impossible in the 3-4 weeks remaining....especially given that we will not be travelling in April, which I think was making me stressed about the sewing.
Friday, February 23, 2007
Taking a Break - Stippled Jacket
Stippled Jacket - written last Friday, Feb 23
On Sunday I learned that Class #2 for the stippled jacket was to be this Friday (ie. today). I had been mulling over some stippling designs in my head, procrastinating the actual start of the project. I got together with my friend Lynn, who is also making a jacket, and we 505'd our sandwiches together in her garage. She's done this sort of thing before. I have not.
With Lynn pushing me I decided to get started on the stippling and stop thinking about it. I drew a pattern of parallel channel stitching along the curved bottom of the jacket, and the bottom of the sleeves, and parallel lines up the center front (where I hope to put a zipper, not being overly fond of those froggy type closures).
The sleeves were just 2" columns of stippling , separated by 1/2" empty columns. I started with the sleeves, and they looked great, so I took at the front pieces. I had a notion to create some flowers somewhere in the business, so I stitched vertical rows of 2" wide stippled panels, separated by 1/2" wide unstippled strips. In the middle of each side, I left the two center panels unstippled, where I created a design of roses and leaves, that looked quite lovely on paper. Quite stunning actually. I developed a pattern from a clipart image, and traced it onto 'heat-away' stabilizer. This was my only mistake in this otherwise nicely percolating project.
There always has to be one idiot move. I never used this sew and burn stuff before, and did not take the trouble to test it first. It was not a lovely experience. It did not sew nicely, it did not burn off nicely, it stinks and is very dusty. Brushing off with a toothbrush works fairly well, but bits of the stuff stuck between some of the close-together stitches. There is no way I can explain (other than working in a rush instead of in my own good time) why I did not use a water-soluble stablizer for this....the whole damn thing has to be washed to shrink it anyway. (This is why I have used the word "idiot").
I stippled amongst my flowers on the first side, then decided it would look better unstippled, leaving the flowers alone in the wide panel on each front. Unstippling is a nice thing to do while watching TV.
My sewing machine decided to have a few grumpy moments during the process, and will likely need a trip to the doctor soon. There is a noise I do not like, and it fetches up every once in awhile and kicks out the bobbin case. I think I forgot to speak nicely to it, and to the fabric each time I sat down.
The good news, though, is that I have dragged out my mother's sewing machine table, and DH put a solid bottom in the 'hole' of it so I now have a level surface to work from. This is great except when I have to lower or raise the feed dogs. Then the whole machine has to be lifted to reach the thingy at the back. It's a very bad design for anyone who changes the dogs frequently. Huskystar C10, new last May. Works well most of the time, but has a couple of chronic hiccups.
Finally, Friday morning around 11am I was done with the sewing, thread snipping, and trimming away of visible flannelette (to prevent fuzzies in the wash). Into the wash the whole thing goes. Out it comes later, looking shrunken as expected, pretty good as far as the effect of the stippled lines on back and sleeve, and so-so on the front. The flowers are not as effective as I had hoped, but alas, one major problem: There is a little hole in the middle of one section of flower, worn totally through by a combination of too much brushing to get rid of the stabilizer, and the subsequent effect of washing. I really think there must be something caustic in that stabilizer because it seemed to act almost like bleach on the fabric surface. Some of the stitching in that area is also pulled out, so I am CRUSHED, that I have managed to ruin this expensive fabric, not to mention all the work.
This makes it slightly less annoying that the course leader called to change the date to next week! Meanwhile, I discovered that I forgot to do the collar, so that is yet to be sandwiched and stippled, and now, rather than purchase yet more fabric and do another front, I think I will make a repair using a pocket. It will have to be sewn on my hand, but that is ok. I guess its good I have another week, more really, because I will be away next week anyway, and won't make the lesson.
It's all repairable, but I cannot hide my disappointment. Also makes it difficult to 'get back on the horse' with enthusiasm, especially after the weekend's disasters with the stretchy pants. I think I need to make a very simple top to regain my confidence.
On Sunday I learned that Class #2 for the stippled jacket was to be this Friday (ie. today). I had been mulling over some stippling designs in my head, procrastinating the actual start of the project. I got together with my friend Lynn, who is also making a jacket, and we 505'd our sandwiches together in her garage. She's done this sort of thing before. I have not.
With Lynn pushing me I decided to get started on the stippling and stop thinking about it. I drew a pattern of parallel channel stitching along the curved bottom of the jacket, and the bottom of the sleeves, and parallel lines up the center front (where I hope to put a zipper, not being overly fond of those froggy type closures).
The sleeves were just 2" columns of stippling , separated by 1/2" empty columns. I started with the sleeves, and they looked great, so I took at the front pieces. I had a notion to create some flowers somewhere in the business, so I stitched vertical rows of 2" wide stippled panels, separated by 1/2" wide unstippled strips. In the middle of each side, I left the two center panels unstippled, where I created a design of roses and leaves, that looked quite lovely on paper. Quite stunning actually. I developed a pattern from a clipart image, and traced it onto 'heat-away' stabilizer. This was my only mistake in this otherwise nicely percolating project.
There always has to be one idiot move. I never used this sew and burn stuff before, and did not take the trouble to test it first. It was not a lovely experience. It did not sew nicely, it did not burn off nicely, it stinks and is very dusty. Brushing off with a toothbrush works fairly well, but bits of the stuff stuck between some of the close-together stitches. There is no way I can explain (other than working in a rush instead of in my own good time) why I did not use a water-soluble stablizer for this....the whole damn thing has to be washed to shrink it anyway. (This is why I have used the word "idiot").
I stippled amongst my flowers on the first side, then decided it would look better unstippled, leaving the flowers alone in the wide panel on each front. Unstippling is a nice thing to do while watching TV.
My sewing machine decided to have a few grumpy moments during the process, and will likely need a trip to the doctor soon. There is a noise I do not like, and it fetches up every once in awhile and kicks out the bobbin case. I think I forgot to speak nicely to it, and to the fabric each time I sat down.
The good news, though, is that I have dragged out my mother's sewing machine table, and DH put a solid bottom in the 'hole' of it so I now have a level surface to work from. This is great except when I have to lower or raise the feed dogs. Then the whole machine has to be lifted to reach the thingy at the back. It's a very bad design for anyone who changes the dogs frequently. Huskystar C10, new last May. Works well most of the time, but has a couple of chronic hiccups.
Finally, Friday morning around 11am I was done with the sewing, thread snipping, and trimming away of visible flannelette (to prevent fuzzies in the wash). Into the wash the whole thing goes. Out it comes later, looking shrunken as expected, pretty good as far as the effect of the stippled lines on back and sleeve, and so-so on the front. The flowers are not as effective as I had hoped, but alas, one major problem: There is a little hole in the middle of one section of flower, worn totally through by a combination of too much brushing to get rid of the stabilizer, and the subsequent effect of washing. I really think there must be something caustic in that stabilizer because it seemed to act almost like bleach on the fabric surface. Some of the stitching in that area is also pulled out, so I am CRUSHED, that I have managed to ruin this expensive fabric, not to mention all the work.
This makes it slightly less annoying that the course leader called to change the date to next week! Meanwhile, I discovered that I forgot to do the collar, so that is yet to be sandwiched and stippled, and now, rather than purchase yet more fabric and do another front, I think I will make a repair using a pocket. It will have to be sewn on my hand, but that is ok. I guess its good I have another week, more really, because I will be away next week anyway, and won't make the lesson.
It's all repairable, but I cannot hide my disappointment. Also makes it difficult to 'get back on the horse' with enthusiasm, especially after the weekend's disasters with the stretchy pants. I think I need to make a very simple top to regain my confidence.
Wednesday, February 14, 2007
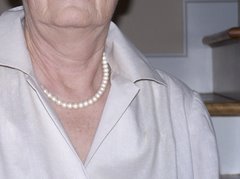
SWAP #5: Beige Blouse -Finished
I mentioned this a couple of days ago. The Burda WOF 10/06 #106, but these are my first pictures.
I wore it today for the first time. That shirt gave me a lot of grief, mostly self-induced, but it sure looks great, and garners compliments galore.


Changes I made:
No gathered sleeves. Next time I would make the sleeve narrower at the bottom and face for a turned-up cuff. The gathers might look ok in another fabric, but not this almost sheer Swiss dot, a kind of cross between beige and ivory.
Less fullness in sleeve cap: I had to adjust the sleeves because of a post-cutting fit problem, hence much of the design fullness was lost. I don't like too-full sleeves so it did not matter. Might make a difference in another fabric, or for another sense of fashion.

I would like to try this in a very drapy rayon fabric, something not not sheer at all. I think it is designed for a polyester print, but I try, on principle, not to wear polyester -- at least not smooth, slippery, incredibly hot versions of it.
Other progress:
I wore it today for the first time. That shirt gave me a lot of grief, mostly self-induced, but it sure looks great, and garners compliments galore.


Changes I made:
No gathered sleeves. Next time I would make the sleeve narrower at the bottom and face for a turned-up cuff. The gathers might look ok in another fabric, but not this almost sheer Swiss dot, a kind of cross between beige and ivory.
Less fullness in sleeve cap: I had to adjust the sleeves because of a post-cutting fit problem, hence much of the design fullness was lost. I don't like too-full sleeves so it did not matter. Might make a difference in another fabric, or for another sense of fashion.

I would like to try this in a very drapy rayon fabric, something not not sheer at all. I think it is designed for a polyester print, but I try, on principle, not to wear polyester -- at least not smooth, slippery, incredibly hot versions of it.
Other progress:
- Taupe Cords: I cut the stretch corduroy after a lot of measuring and tracing the Burda WOF 02/07 #120. The measurements are almost exactly those of a favorite pair if stretch cords I have now, so here's keeping the fingers crossed for the fit.
- Bamboo Skirt: Yesterday I decided on the hem length for the bamboo skirt, and have it pinned. Waiting for DH to check the pinning before stitching it in.
- Reversible Jacket:
 I practiced my stippling on a test 'sandwich' . I like my sunflower idea with varieties of stippling moving away from it. - but as I pass by my sandwich sitting on the ironing board, I can't help but wonder if maybe more than one flower, randomly thrown into a chaotic blend of stippling might just work.
On the black side, the stippling shows well, on the green print side, I have not found a color that really pops, so I think a green much like the print will be best for a rather subdued presentation. This picture does not do justice to the colors.
 - Black Cami: I tried to sew some lace to the top of the black sparkly cami, but the neckline tipped outward in the middle, as often happens with necklines that I fold under. This time I sewed the lace to the front right side and turned the seam to the back, topstitching on the right side through the seam. Looks good, but for the sagging forward in the middle. This little item will likely be a scrapper -- not a SWAP thing anyway.


- Bamboo Cowl Neck shirt: I opened up the rest of the bamboo, and found I had enough for the cowl neck shirt I was thinking of, but I couldnt' get into the mood to work with the bamboo. Very soft and stretchy, this pattern is cut in one layer, the whole front and whole back, all on the bias. You can see why I need to be in the mood. Corduroy is so much easier by comparison.
- Fleece Jacket: I bought 2 zippers, neither of which is right, but in this town you can't usually get what you want. I also fiddled with some lining fabric to put inside the bottom of the front pieces for hidden pockets, and to stiffen up the jacket a bit. Undecided about the outcome; maybe I should just put pockets on the outside. I'm also undecided about whether to try to stiffen up the bottom of the back a bit. The fleece is quite lightweight, and I think I should have interlined the whole thing. I own a Woolrich Fleece jacket which has the inside pocket bit, but only the binding gives some body to the bottom edge in the back. These kinds of things I set aside for a day or a week, and when I go back to them, the answer seems to be there.
Subscribe to:
Posts (Atom)