Showing posts with label Burda WOF. Show all posts

Wednesday, February 14, 2007

SWAP #5: Beige Blouse -Finished

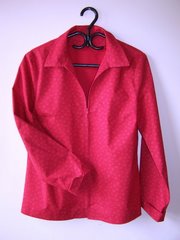
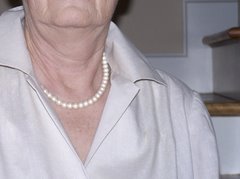
I mentioned this a couple of days ago. The Burda WOF 10/06 #106, but these are my first pictures.

I wore it today for the first time. That shirt gave me a lot of grief, mostly self-induced, but it sure looks great, and garners compliments galore.


Changes I made:
No gathered sleeves. Next time I would make the sleeve narrower at the bottom and face for a turned-up cuff. The gathers might look ok in another fabric, but not this almost sheer Swiss dot, a kind of cross between beige and ivory.

Less fullness in sleeve cap: I had to adjust the sleeves because of a post-cutting fit problem, hence much of the design fullness was lost. I don't like too-full sleeves so it did not matter. Might make a difference in another fabric, or for another sense of fashion.


I would like to try this in a very drapy rayon fabric, something not not sheer at all. I think it is designed for a polyester print, but I try, on principle, not to wear polyester -- at least not smooth, slippery, incredibly hot versions of it.


Other progress:

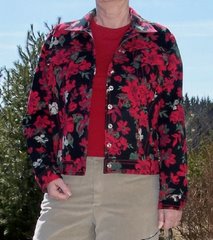
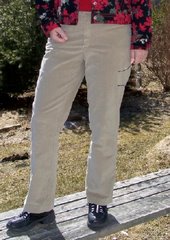
  • Taupe Cords: I cut the stretch corduroy after a lot of measuring and tracing the Burda WOF 02/07 #120. The measurements are almost exactly those of a favorite pair if stretch cords I have now, so here's keeping the fingers crossed for the fit.

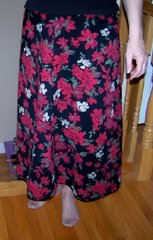
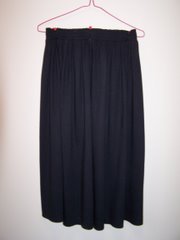
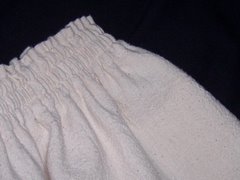
  • Bamboo Skirt: Yesterday I decided on the hem length for the bamboo skirt, and have it pinned. Waiting for DH to check the pinning before stitching it in.

  • Reversible Jacket:
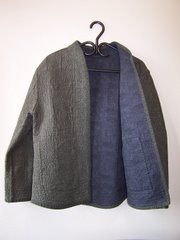
    I practiced my stippling on a test 'sandwich' . I like my sunflower idea with varieties of stippling moving away from it. - but as I pass by my sandwich sitting on the ironing board, I can't help but wonder if maybe more than one flower, randomly thrown into a chaotic blend of stippling might just work.

    On the black side, the stippling shows well, on the green print side, I have not found a color that really pops, so I think a green much like the print will be best for a rather subdued presentation. This picture does not do justice to the colors.


  • Black Cami: I tried to sew some lace to the top of the black sparkly cami, but the neckline tipped outward in the middle, as often happens with necklines that I fold under. This time I sewed the lace to the front right side and turned the seam to the back, topstitching on the right side through the seam. Looks good, but for the sagging forward in the middle. This little item will likely be a scrapper -- not a SWAP thing anyway.

  • Bamboo Cowl Neck shirt: I opened up the rest of the bamboo, and found I had enough for the cowl neck shirt I was thinking of, but I couldnt' get into the mood to work with the bamboo. Very soft and stretchy, this pattern is cut in one layer, the whole front and whole back, all on the bias. You can see why I need to be in the mood. Corduroy is so much easier by comparison.

  • Fleece Jacket: I bought 2 zippers, neither of which is right, but in this town you can't usually get what you want. I also fiddled with some lining fabric to put inside the bottom of the front pieces for hidden pockets, and to stiffen up the jacket a bit. Undecided about the outcome; maybe I should just put pockets on the outside. I'm also undecided about whether to try to stiffen up the bottom of the back a bit. The fleece is quite lightweight, and I think I should have interlined the whole thing. I own a Woolrich Fleece jacket which has the inside pocket bit, but only the binding gives some body to the bottom edge in the back. These kinds of things I set aside for a day or a week, and when I go back to them, the answer seems to be there.
End of today's meanderings.

Monday, January 8, 2007

SWAP #5: Beige Blouse - Continued

This was a stormy day. The first snow since early December, and more like freezing rain. Nasty to be out, so my plans for the day were cancelled. One would expect to spend the day in fabulous sewing, or at least in doing chores from the back burner. However, this was not to be so. Mostly frittered it away, and then finally decided to tackle the errant BB (beige blouse) collar.

I think this collar is giving me grief because of the interfacing. It is just too heavy and inflexible for what is required to fit the collar. The muslin collar went in much more easily.

The method used is to attach the stand to the collar, then sew the outside edges of the collar together. The under-collar stand is sewed to the back neck, then the front 2 collar pieces are sandwiched between the shirt front and the turned back facing. Sounds good in theory, but there is some interesting curve matching involved.

I finally got it reasonably in place only to discover that the front facing was not hanging right on one side. Took that side out, and re-did it only to find out that the bit of shirt that extends beyond the collar in the front is not the same on both sides. More obvious in real life than in the picture. There is something funny going on at the shoulder seam on the "bad" side. Once I fix that, maybe the edge will move back enough to match the "good" side. Back to the drawing board.

The lesson from this is to start at the front and fix the collar edge in place then work to get everything else to fit right. The other lesson is to use very fine interfacing, or at least not fusible. Then, there is the lesson that if one is to put those circles of stitching to help the collar stand up in the back they should NOT be on the undercollar, as this will show when the upper collar is standing!! DUH. The circles should be at the back neck of the upper collar, where they won't show regardless of whether the collar is up or down. Also, they should be very neat compared to what I did when I was thinking they would never show at any time.

Learning is such fun!!!

Tonight I will be at my tai chi class, so will not likely get to tackle the collar again. I think it needs to be totally taken off and reapplied. I am wondering if I should cut the seam back to maybe 3/8" and work from there. I think the side partially interfaced seam allowance is part of the problem. If the whole thing is apart, I can hopefully get all the seams the same width and start over. How I hate ripping stuff out - especially when I should have been able to do it right in the first place.

Sunday, January 7, 2007

SWAP #5: Light Beige Blouse - Burda WOF

For the last couple of days I have turned my attention back to the Burda WOF shirt, Oct/06 #106. The muslin was partially done, and I had quit at the sleeves when I discovered that they were quite full at the sleeve cap, and I had done a sloppy job of gathering. Originally, this was to have been a wearable muslin, and perhaps one day I will remove the sleeves and re-do the caps. Meanwhile it has served its fitting purpose:
  1. Added 1.5" to lower the bust
  2. Added 1/2 inch to the fronts at the SA to accomodate full bust, and to the sleeve front so it will fit.
  3. Determined that the sleeve requires a very fine elastic, narrower than 1cm.
  4. Otherwise, the fit looks good.
  5. There were also a few construction details that I was able to iron out, especially around the fitting together of the collar.
Further examination of the muslin resulted in
  1. Not using an elastic at the sleeve, but simply widening it a bit at the bottom, and hemming. This looks much better than the gathered sleeve, at least in cotton
  2. Adjusting 1/2" on the back shoulder seam at the outside edge, for a forward shoulder. This seems to be something I will have to do regularly.
  3. Adding 2" to the length so the bottom of the shirt will fall at the first 1/5 point on the hip.
I made all these changes to the pattern, and discovered that I was very short of fabric. Not enough to make a collar on grain. Advice from Stitchers told me it would be ok on the cross-grain so that is what I did.

This is a fussy shirt. There are 3 tucks at each shoulder in the front, and the sleeve caps are quie full. It is intended to be made in a soft fabric, and this Swiss Dot cotton seems fine. It is a but fussy to work with however. The tucks went in smoothly, and I first sewed the shoulder seams making no adjustment to the front, just addint 1/2" to the back seam, tapered to nothing at the collar edge. The fit looked good, but arranging the sleeve became quite a problem -- probably one I should have solved before cutting them out. Essentially, I had added 1/2" to the back and made no change to the front. Where does this put the sleeve cap?? My original thought had been that the 1/2" would eat up some of the extra fullnes, but then there is the matter of keeping the grain straight. I had read a tip somewhere to baste a line parallel to the grain across the sleeve cap. This must be level if the sleeve is to fall correctly. The sleeve looked ok, but the line was not quite level.

This is where I decided to sew up the side seams and forget trying to get the sleeves in flat. When I did this, I found there were funny bumps around the shoulder area, so I undid the seams and took almost 1/2" off the front seam at the shoulder edge, tapering back about 2". This seemed to take care of the bump in the front, and should also eliminate some of the sleeve fitting questions. Not there yet.

I am planning to finish the seams of this blouse on my serger, but since I may have to take out the shoulder seams again, I did a self-fabric HongKong finish on them. I think it's a bit bulky, and may show through the shirt. But I would have to serge before putting on the collar, then if I have to take the seam out, there will not be enough of it left. The side seams and sleeve seams, I will eventually serge.

I made up the collar, remembering from before that the dots on the stand and collar are essential and have to be placed exactly to get the collar to fit onto the band. I am still not sure whether the seamline should be extended beyond the dots, or should stop there. Of ocurse, my machine decided to act up during the topstitching. An annoyance, but I dont think it shows too much -- it's where the band and collar join.

I also tried some circles of stitching at the center back of the under collar to see how it works to keep the collar up. I am not even sure this style will look good with the collar standing up in the back, but I wanted to try the technique, and it can always be folded over anyway.

I ran into some interfacing problems. I pre-shrunk the I/F but I don't think it was shrunk enough..I am a bit worried how this will come out in the wash, but I did not have any fabric leftover to re-cut, so I will just have to give it careful laundering and hope for the best.

I left the project after getting the collar ready to stitch on. I don't like to sew collars at night after several hours of work.

Next time, I'll get the collar done, and hopefully the sleeves. Then there will just be buttons and hem. I'm not sure yet what I will use for buttons, something small and dressy, or self-covered ones.