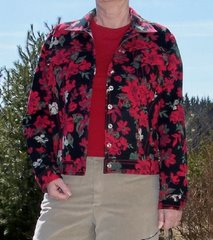
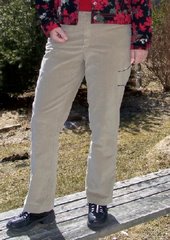
Everything that could have gone wrong did...but the OneSeams are done, and they look terrific!
I decided to make these pants because they seem to be one of the online community's favorite wardrobe items. Knowing they were elastic waist, and quite roomy, I figured I could use them for tai chi pants, but honestly did not think they would suit me as a true 'wardrobe' item.
Things that went wrong #1: Cut the wrong size: My friend and I cut our patterns together, and helped with our alterations and size choices. After cutting, I lost a bit of weight, and did a bit more careful measuring and decided I should have cut a smaller size. My friend meanwhile, came to the same conclusion, fortunately BEFORE she had done the cutting. She finished her pants, I tried them on, and re-cut my pieces. It was trickier than I expected to get the smaller size to fit completely within the medium pieces without changing the grain line. Also, I had to re-measure for the length and crotch adjustments.
Things that went wrong #2: Used lining for the pocket:
 I decided to use the elephant ear pockets as my fashion fabric was quite heavy, and I did not want 2 more layers of it in the front of the pants. I used a piece of lining fabric, a bit lighter in color than the pants. It did not occur to me until the pockets were sewn in that I should have faced an inch or so on the bottom pocket piece with the same fabric as the pants. The difference in the fabric is obvious if the pocket opening is pulled in the least way. I adjusted the bar tack at the bottom and moved it further up, and stitched down form the waist a bit to make the pocket opening smaller, and hold the front ovelap in place. All's well that ends well.
Things that went wrong #3: Sewed the pocket onto the wrong side: This happened AFTER I got the directions clarified by Louise Cutting herself. Feeling especially gratified and confident, I proceeded to put in the second pocket up to the point where the first one had stymied me. My plan was to follow Louise's new directions on both pockets at once. Fine idea, until I came to the part where it says "turn pocket to the wrong side" whereupon I discovered it was already on the wrong side. These pockets have a long slit into the side of the pants, the seam is sewed with tiny stitches tapering to nothing at the bottom. These I had to remove, re-sew, re-serge the edges and finally get the pocket done right. This is when I decided never to do elephant ear pockets again. I would rather get used to stuffing a kleenex in my sock.
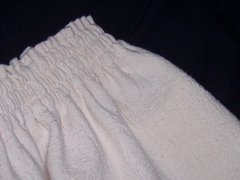
Things that went wrong #4: Made the elastic too long: I have difficulty knowing exactly where my waist is, but I measured the elastic snugly, and 6.5 inches shorter than the top of the pants, per the pattern recommendations. It went in nicely, but when I tried it on, it was not snug enough. I cut about an inch and a half off.....and let go of the ends!! It took me 2 TV shows and a phone call to fish out the ends with a pin, bit by bit, at the end of which time my daughter said "Why didn't you use the kitchen tongs?" I pinned both ends back a couple of inches and tried the pants on. The fit was good, so I decided to cut the 4" off.
Things that went wrong #5: The elastic would not stretch enough: Early this morning, thinking I would be able to finishe the pants in time for tai chi class at 10:00 am, I sewed the elastic ends together and proceeded to make the first topstitching line. Delightfully even, nicely matching thread, machine purring and happy.....until I got to about 10" from the starting point and had a pile of gathers accumulating and no way for the elastic to stretch through them. All this before breakfast yet! Now I know why Louise has an instruction about making a tuck in the waistband if the elastic will not stretch as long as the top of the pants. This must be done at the start, however, not after cutting another 5.5 inches off the recommended length. I figured I would just cut off the whole band and sew on another one, but when I returned to the task I found that if I removed half of the topstitching row and paid more attention to the stretching I could get it to work, just barely, but it did work.
Things that went wrong #6: Hems don't match: Happy to be almost done, I serged the leg bottoms, turned them up on the hemline and tried them on. One leg is quite a bit shorter than the other. How can this be when both pieces were cut together? The mystery remains, and will forever. I got someone to pin the hems, cut and re-serged one leg, and stitched them up.
ALL IN ALL, the pants would have gone quite quickly but for
 correcting all these misadventures, and best of all, the final product looks quite sharp, and is incredibly comfortable. I would like to try the pattern again, just to get some value out of all these problems. I am going to try the tapered leg version, as the straight leg ones are quite large in the legs. I am wondering what they would be like made from a light knit -- perhaps I would have to downsize once more to allow for the stretch - research required.